
Package Exports
- atomizify
- atomizify/index.js
This package does not declare an exports field, so the exports above have been automatically detected and optimized by JSPM instead. If any package subpath is missing, it is recommended to post an issue to the original package (atomizify) to support the "exports" field. If that is not possible, create a JSPM override to customize the exports field for this package.
Readme
atomizify
atomizify is a small JavaScript library that generates a bunch of atomic CSS classes.
How to get it ?
Install the module in your folder:
npm i atomizifyImport it in your file:
import { atomizify } from 'atomizify'How to use it ?
atomizify can fit all types of developers, from lazy to geekiest ones!
It provides a few options to play with it: set some filters, choose your typecase system, or add your own custom classes.
Choose the profile that suits you the best:
You're a ready-made lover: by default,
atomizifyoffers thousands of predefined classes. Just call the function, and a whole galaxy of CSS classes appears.atomizify()
You're a less-is-more expert:
atomizifylets you select / unselect the classes of your choice among the predefined sets & generate only the substancial ones.// you can pass the 'filters' object, which accepts 3 sub-objects: 'sets', 'subsets', 'properties' // each sub-object accepts 2 key-value pairs: 'names' and 'to_remove' atomizify({ filters: { sets: { names: ['layout'], // 'names' is an array containing the names of the targetted items (to keep, or to remove if the prop 'to_remove' is passed to 'true') }, subsets: { names: ['dimensions'], }, properties: { names: ['min-height', 'min-width'], to_remove: true, // set to 'true' if you want to remove the targetted items listed in 'names' }, }, })
You're a custom-all freak:
atomizifygives you complete freedom to create and add your own custom classes. You can also personalize the typecase system for your classes' names.// you can pass the 'custom_classes' object, in which each entry is a key-value pair: // the key as the desired class name, and the string value as the desired CSS rule // you can also set the 'typecase' string value to choose the formatting of your classes' names atomizify({ typecase: 'dash', // choose among 'snake', 'dash' or 'camel' case ; default is 'snake' custom_classes: { myclass1: 'background: black; color: turquoise', myclass2: 'border-color: pink', myclass3: 'font-size: 200px', }, })
atomizify also works with React: it allows you to convert all the generated atomic classes in elegant-as-hell flags, that you can comfortably use & combine to build modular components ; and all of this thanks to kigiri.
To achieve that, you'll have to install his invaluable dallas module as well:
npm i dallasAll set? Now, you can import the flagify function in your React app, and make an unwise use of the Component magic:
import { flagify } from 'atomizify'

const { Component } = flagify()

// chain the 'Component' object to every CSS classes you want to apply to your element,
// and finish by calling the type of HTML element you aim to render (div, span, section, input, etc.)
const Title = Component.fs55.sapphire3.mb40.div()

const App = () => <Title>atomizify</Title> // then use it as any React component
How to document it ?
atomizify also provides some ready-to-use generated documentation, so you can see at a glance all the magnificent CSS classes that have been generated.
Import & call the desired function(s) in your file:
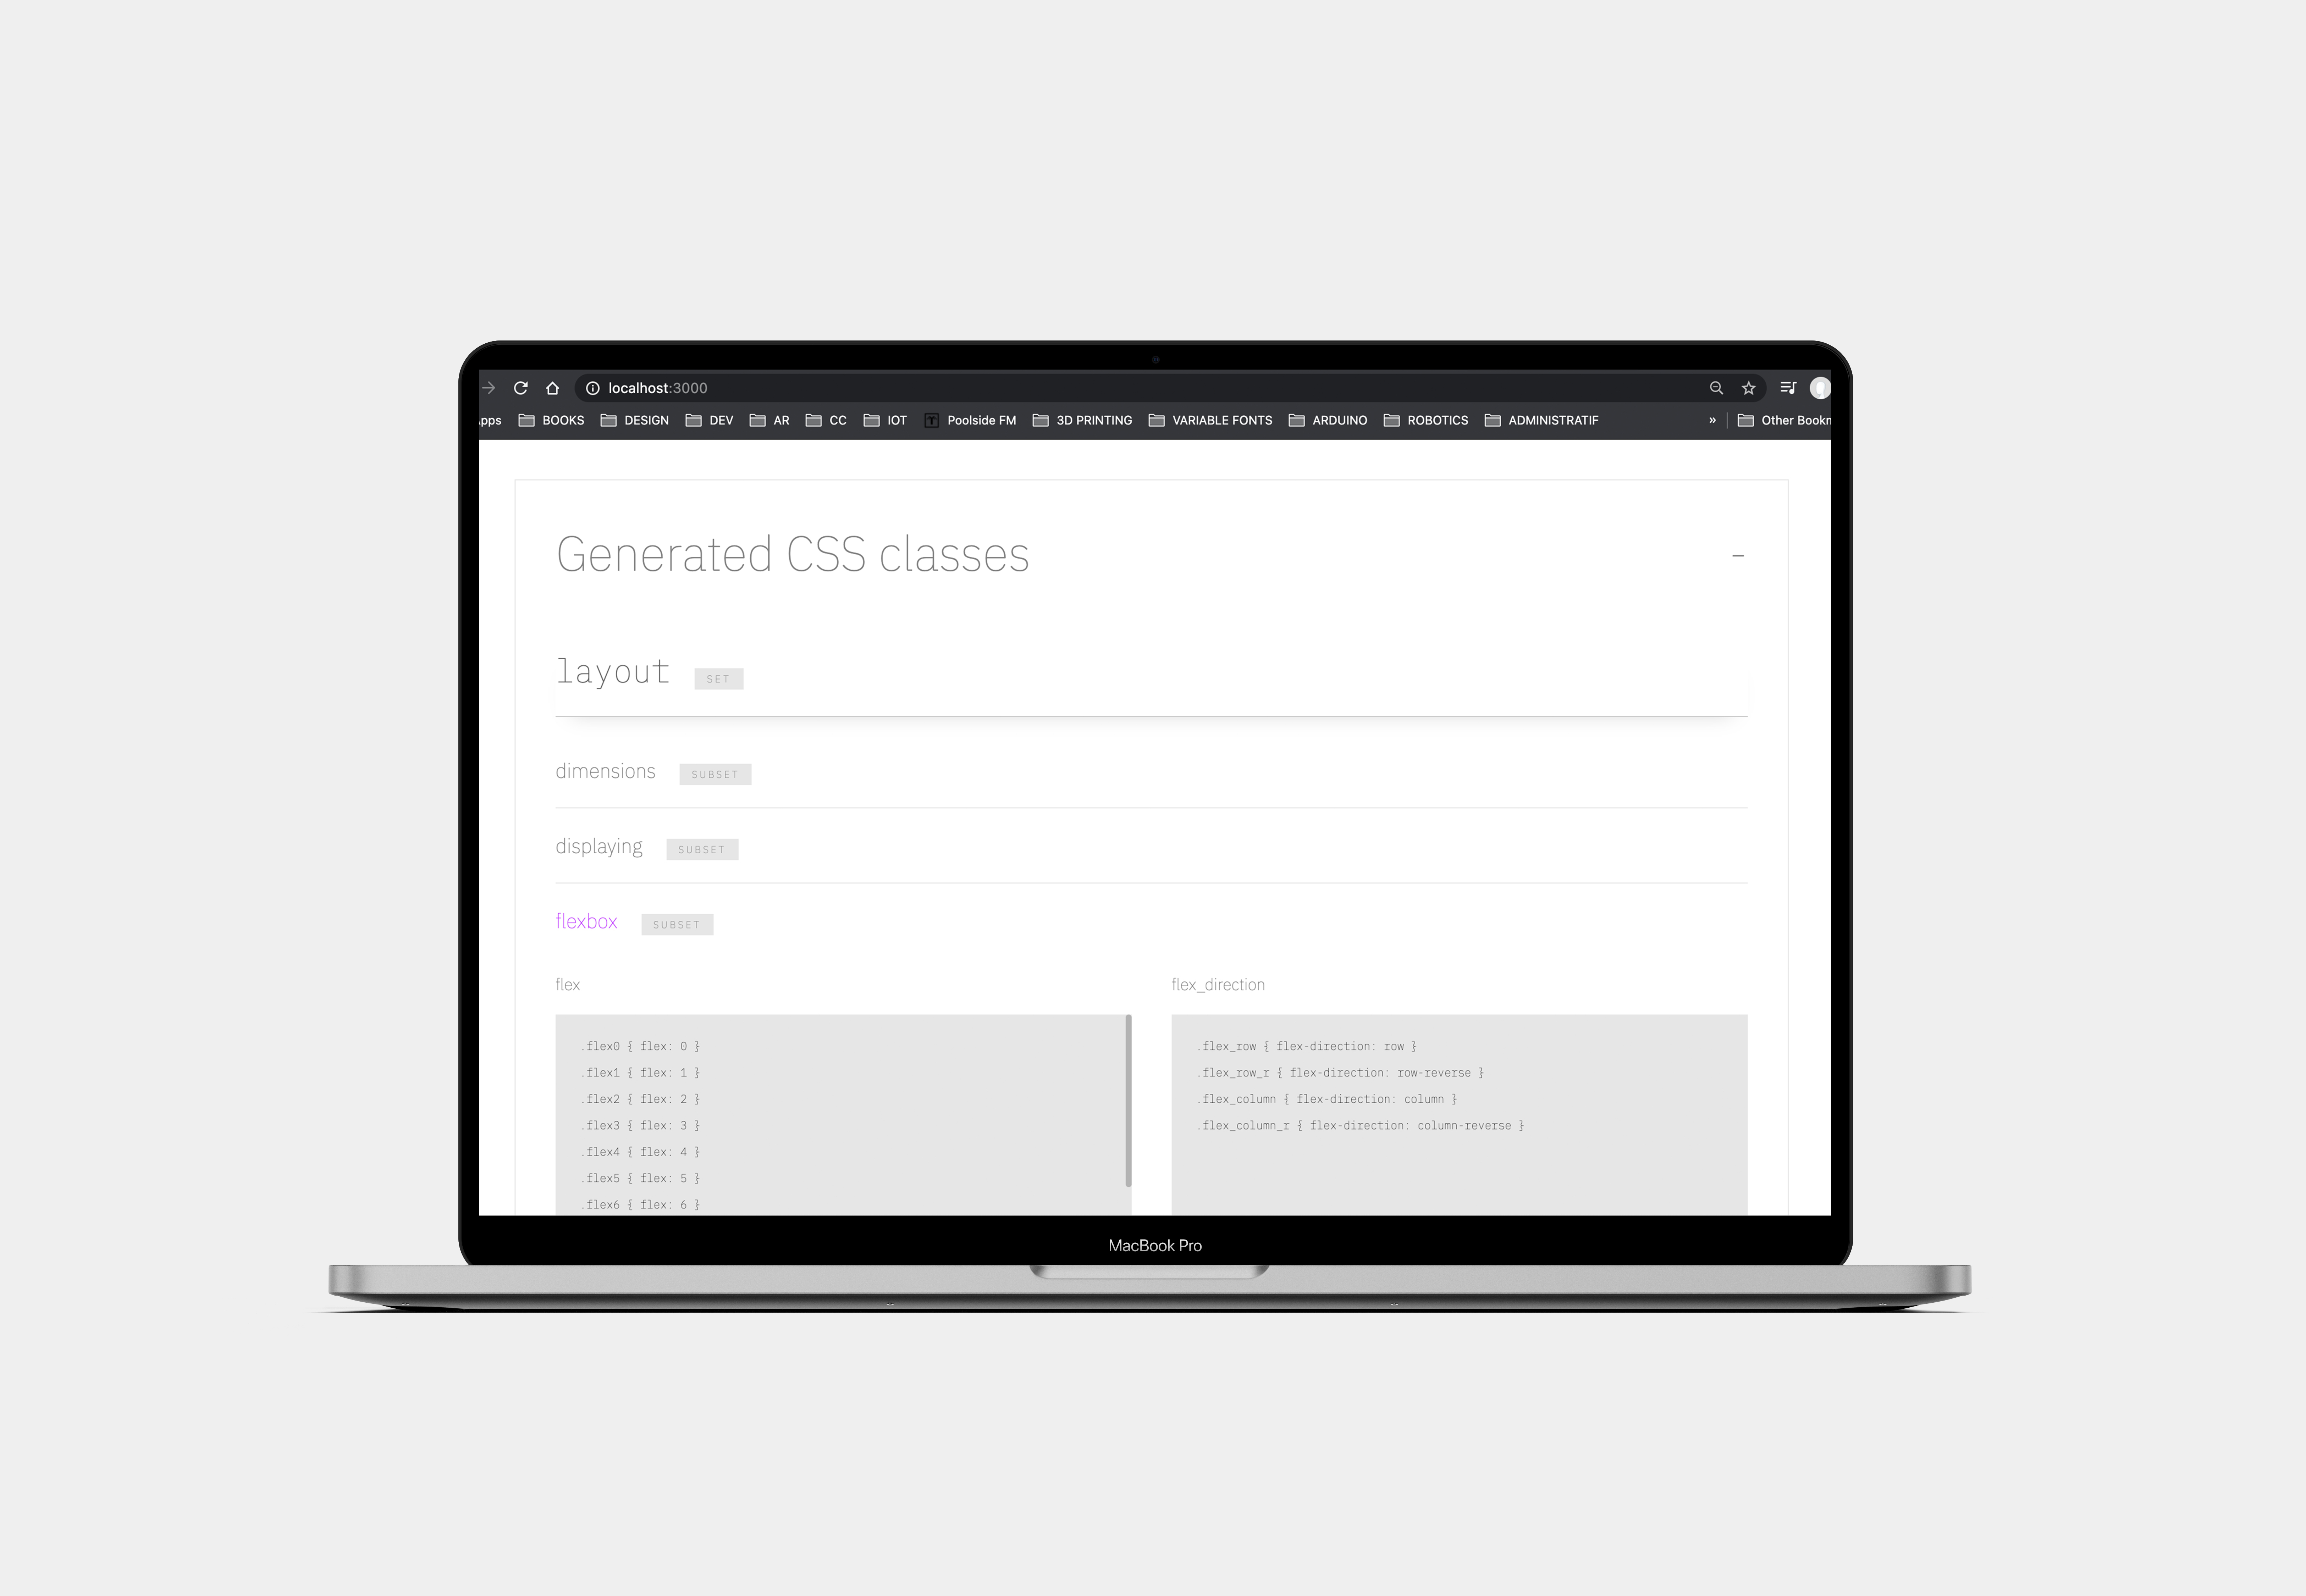
- If you'd like to display the CSS code generated, be my guest:
import { display_classes } from 'atomizify/doc'

// the 'display_classes' function can be called without argument
// it also accepts the following options, passed in an object: 'node', 'open', 'flattened'

display_classes({
  node: my_html_node, // you can pass a HTML node that will contain the chart ; default is 'document.body'
  open: false, // you can set the initial state of the component displaying the content ; default is 'true'
  flattened: false, // you can display the CSS classes all flattened, without the parents sections (sets, subsets and properties) ; default is 'false'
})
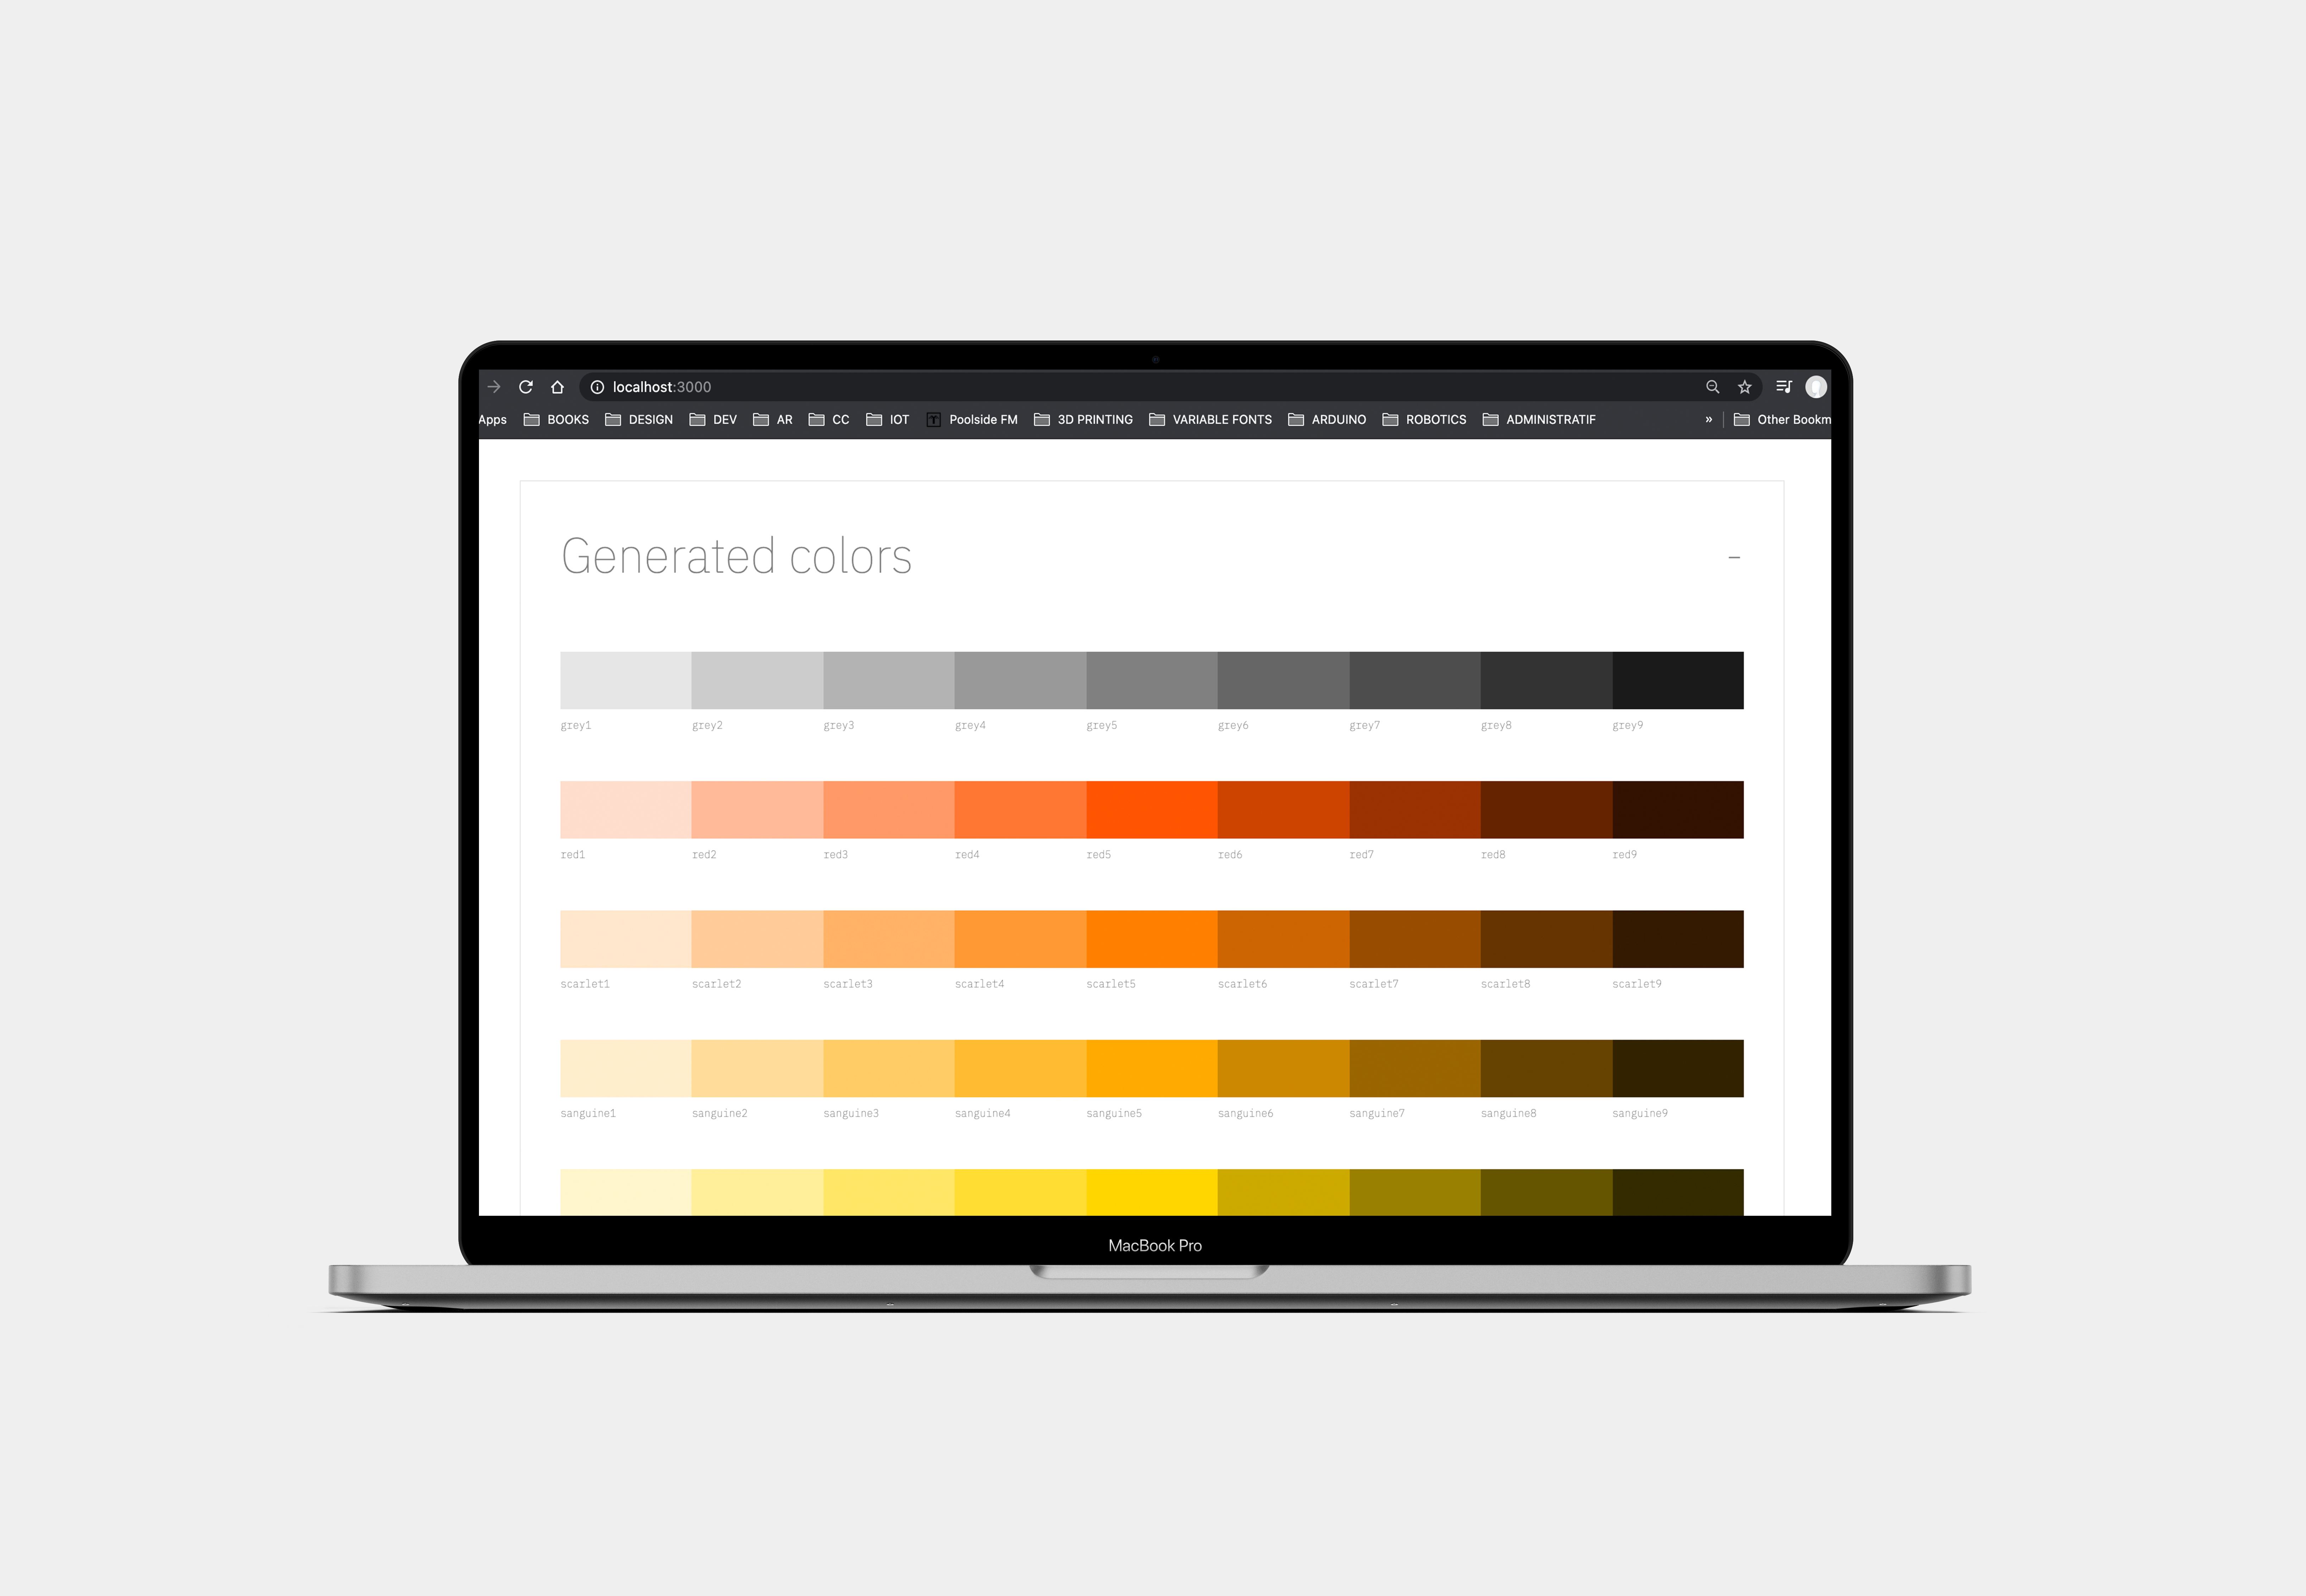
- If you'd like to display a chart of the generated colors, suit yourself:
import { display_colors } from 'atomizify/doc'

// the 'display_colors' function can be called without argument
// it also accepts the following options, passed in an object: 'node', 'open', 'circles'

display_colors({
  node: my_html_node, // you can pass a HTML node that will contain the chart ; default is 'document.body'
  open: false, // you can set the initial state of the component displaying the content ; default is 'true'
  circles: false, // you can set the visual shape of the colors as circles ; default is 'false'
})
And voilà!