Package Exports
- react-indiepay
- react-indiepay/dist/index.js
This package does not declare an exports field, so the exports above have been automatically detected and optimized by JSPM instead. If any package subpath is missing, it is recommended to post an issue to the original package (react-indiepay) to support the "exports" field. If that is not possible, create a JSPM override to customize the exports field for this package.
Readme
react-indiepay
This is the client-side SDK for interacting with the Indie Pay API for payment checkouts. This package has to be used only in case you are using the indiepay for initiating payment requests on your server, so that you do not expose the AUTH_TOKEN and APP_ID for your project on the client side.
Installation
Install the typescript compatible client side package for using the premade Checkout component:
cd my-react-app

npm i react-indiepay
Usage
Follow the server-side sdk setup from indiepay.
NOTE: Never expose these tokens on your client side!
Once you have made an API call to your backend and it returns you the transactionRequestID, pass that as a prop the the Checkout component in your functional component/page:
import { useEffect, useState } from "react";
import { Checkout } from "react-indiepay";
const getTxnReqID = async () => {
const response = await fetch("/your/api/endpoint", {
method: "POST",
});
const data = await response.json();
return data;
};
export default function Home() {
const [txnReqID, setTxnReqID] = useState("");
useEffect(() => {
getTxnReqID().then((txnReqID) => {
console.log(txnReqID);
setTxnReqID(txnReqID.transactionRequestID);
});
}, []);
return (
<main className="flex min-h-screen flex-col items-center justify-between p-24">
<Checkout
transactionRequestID={txnReqID}
successURL="/success" // Will be redirected on success after 10s
failureURL="/fail" // Will be redirected on failure after 10s
/>
</main>
);
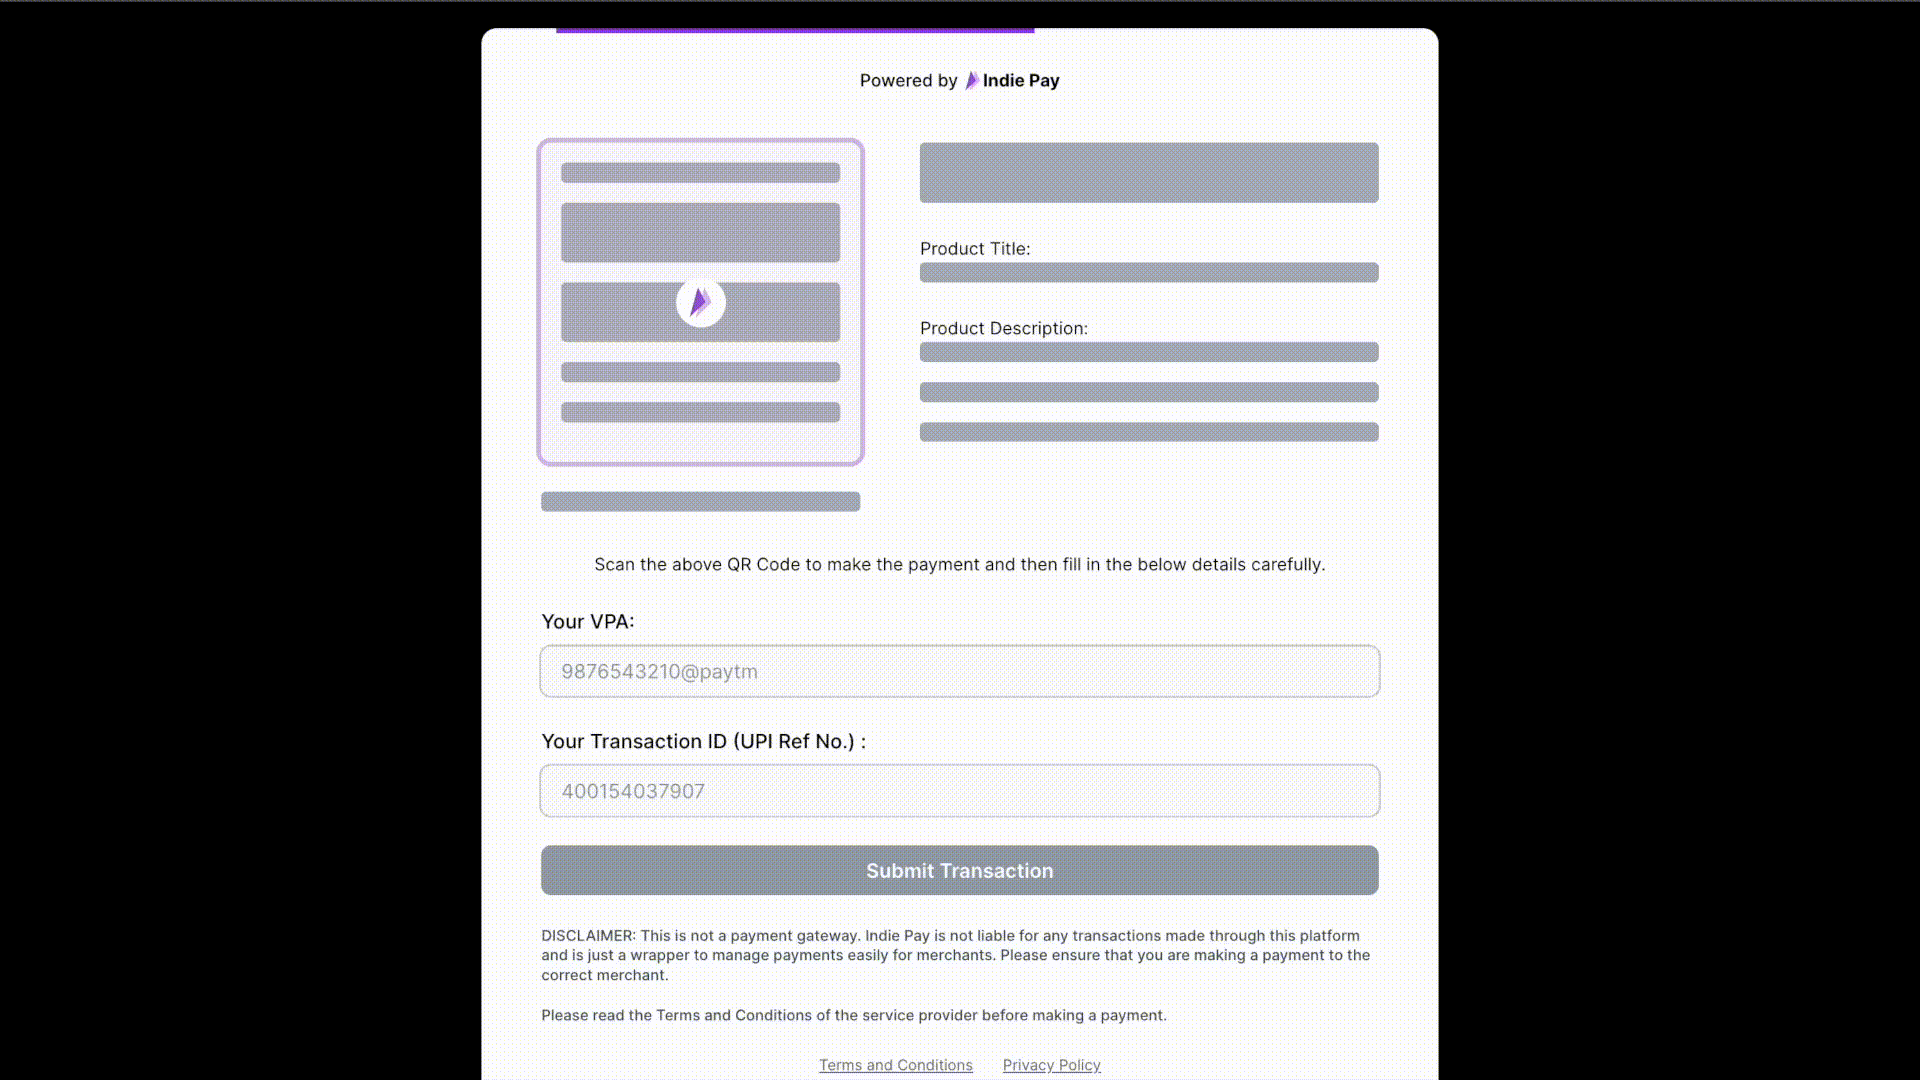
}The checkout component will fetch the transaction request data once a valid transactionRequestID is provided and will then render appropriate information, creating a dynamic QR code for UPI payments. After the user has made the payment, has input their VPA and UPI Reference No. and click submit, the request goes to IndiePay and you can view the transaction on the server. You can accept/reject the transaction from you App dashboard.
Thats it! You are all set to collect UPI payments and receive transaction requests on your Indie Pay dashboard.
Last Step
Keep your backend ready to receive webhooks from Indie Pay.
Indie Pay will send a POST request to the webhook URL you provided with the following payload whenever you accept or reject an order. You can process subscriptions using the metadata, status, and order ID.
Kindly return a 200 OK response to the webhook request to avoid multiple retries. In case of a failure, Indie Pay will retry sending the webhook 3 times with an exponential backoff.