
Package Exports
- @react-three/rapier
- @react-three/rapier/dist/react-three-rapier.cjs.js
- @react-three/rapier/dist/react-three-rapier.esm.js
This package does not declare an exports field, so the exports above have been automatically detected and optimized by JSPM instead. If any package subpath is missing, it is recommended to post an issue to the original package (@react-three/rapier) to support the "exports" field. If that is not possible, create a JSPM override to customize the exports field for this package.
Readme


⚠️ This library is under development. All APIs are subject to change. ⚠️
For contributions, please read the 🪧 Contribution Guide.
For available APIs, see 🧩 API Docs
react-three/rapier (or r3/rapier) is a wrapper library around the Rapier (https://rapier.rs/docs/user_guides/javascript) WASM-based physics engine, designed to slot seamlessly into a react-three/fiber pipeline.
The goal of this library to is to provide a fast physics engine with minimal friction and small, straight forward API.
Basic Usage
import { Box, Torus } from "@react-three/drei";
import { Canvas } from "@react-three/fiber";
import { Physics, RigidBody, Debug } from "@react-three/rapier";

const App = () => {
  return (
    <Canvas>
      <Suspense>
        <Physics>
          <RigidBody colliders={"hull"} restitution={2}>
            <Torus />
          </RigidBody>

          <CuboidCollider position={[0, -2, 0]} args={[20, .5, 20]} />

          <Debug />
        </Physics>
      </Suspense>
    </Canvas>
  );
};
📝 Readme note
Below follows a guide on core concepts for react-three/rapier.
For full API outline and documentation, see 🧩 API Docs.
Readme Topics
- Basic Usage
- 📝 Readme note
- Readme Topics
- The Physics Component
- The RigidBody Component
- Automatic Colliders
- Collider Components
- Instanced Meshes
- Debug
- Collision Events
- Contact force events
- Sensors
- Attractors
- Configuring Time Step Size
- Joints
- Advanced hooks usage
The Physics Component
The <Physics /> component is the root component of your physics world. It is responsible for creating the physics world and managing the simulation. It relies on lazily initiating Rapier and needs to be wrapped in <Suspense />.
🧩 See PhysicsProps docs for available props.
const Scene = () => {
  return (
    <Canvas>
      <Suspense>
        <Physics
          gravity={[0,1,0]}
          interpolation={false}
          colliders={false}
        >
          ...
        </Physics>
      </Suspense>
    </Canvas>
  );
}
The RigidBody Component
The <RigidBody /> component is used to add a mesh into the physics world. You use it by wrapping one or more meshes and setting desired props. By default, this will automatically generate Colliders based on the shape of the wrapped meshes (see Automatic colliders).
🧩 See RigidBodyProps docs for available props.
const RigidBodyMesh = () => (
  <RigidBody>
    <mesh />
  </RigidBody>
);
Automatic Colliders
RigidBodies generate automatic colliders by default for all meshes that it contains. You can control the default collider by setting the colliders prop on a <RigidBody />, or change it globally by setting colliders on <Physics />. Setting colliders={false} disables auto-generation.
Supported values:
"cuboid", creates a CuboidCollider based on the bounding box of the mesh"ball", creates a SphereCollider based on the bounding sphere of the mesh"trimesh", creates a TrimeshCollider based on the mesh's geometry -- note trimeshes are massless by default (https://rapier.rs/docs/user_guides/javascript/common_mistakes#rigid-body-isnt-affected-by-gravity)"hull", creates a ConvexHullCollider based on the mesh's geometryfalse, disables auto-generation
Generate ConvexHull colliders for all meshes in a RigidBody by default:
const Scene = () => (
  <Physics colliders="hull">
    <RigidBody>
      <Box />
    </RigidBody>
    <RigidBody position={[0, 10, 0]}>
      <Sphere />
    </RigidBody>
  </Physics>
);
Turn off automatic collider generation globally, but apply auto generation locally:
const Scene = () => (
  <Physics colliders={false}>
    {/* Use an automatic CuboidCollider for all meshes inside this RigidBody */}
    <RigidBody colliders="cuboid">
      <Box />
    </RigidBody>

    {/* Use an automatic BallCollider for all meshes inside this RigidBody */}
    <RigidBody position={[0, 10, 0]} colliders="ball">
      <Sphere />
    </RigidBody>
  </Physics>
);
Collider Components
You can also create Colliders by hand and add them to a RigidBody to create compound colliders. This is useful for creating more complex shapes, for creating simplified shapes for performance reasons, or for detecting collisions on specific parts of a mesh.
🧩 See ColliderProps docs for available props.
const Scene = () => (<>
  {/* Make a compound shape with two custom BallColliders */}
  <RigidBody position={[0, 10, 0]}>
    <Sphere />
    <BallCollider args={[0.5]} />
    <BallCollider args={[0.5]} position={[1, 0, 0]} />
  </RigidBody>

  {/* Make a compound shape with two custom BallColliders, an automatic BallCollider,
      Two automatic MeshColliders, based on two different shape types */}
  <RigidBody position={[0, 10, 0]} colliders='ball'>
    <MeshCollider type="trimesh">
      <mesh ... />
    </MeshCollider>

    <MeshCollider type="hull">
      <mesh ... />
    </MeshCollider>

    <Sphere />

    <BallCollider args={[0.5]} />
    <BallCollider args={[0.5]} position={[1, 0, 0]} />
  </RigidBody>
<>)
RigidBodies work inside other transformed objects as well. Simulation runs in world space and is transformed to the objects local space, so that things act as you'd expect.
Note It's always best to create RigidBodies where the center of gravity is in the center of the object, otherwise you might get some unexpected behavior during simulation interpolation.
import { Box } from "@react-three/drei";
import { RigidBody, CuboidCollider } from "@react-three/rapier";

const Scene = () => (
  <group position={[2, 5, 0]} rotation={[0, 0.3, 2]}>
    <RigidBody>
      <Box />
      <CuboidCollider args={[0.5, 0.5, 0.5]} />
    </RigidBody>
  </group>
);
If part of our meshes are invisible and you want to include them in the collider creation, use the includeInvisible flag.
<RigidBody colliders="hull" includeInvisible>
<object3D>
<Suzanne visible={false} />
</object3D>
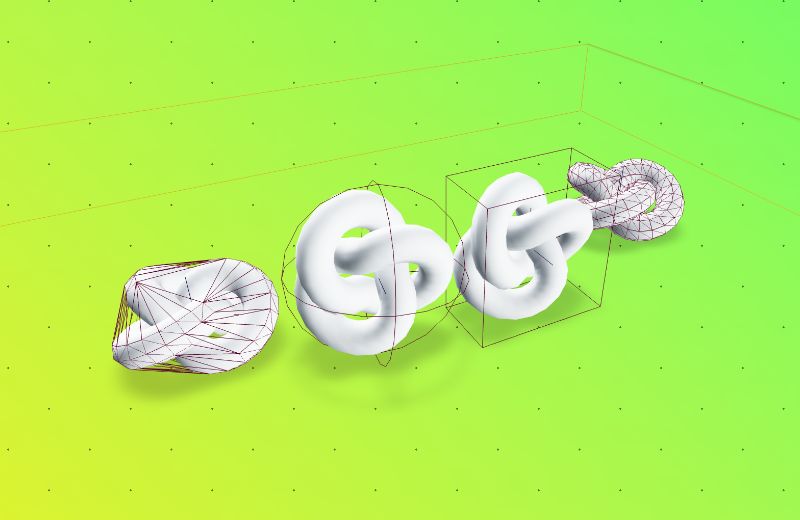
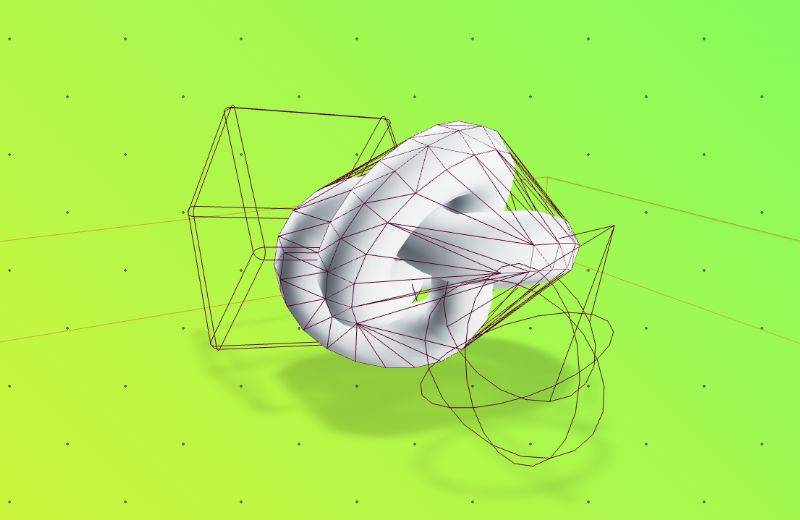
</RigidBody>🖼 Collider Examples
Instanced Meshes
Instanced meshes can also be used and have automatic colliders generated from their mesh.
By wrapping the InstancedMesh in <InstancedRigidBodies />, each instance will be attached to an individual RigidBody.
🧩 See InstancedRigidBodiesProps docs for available props.
import { InstancedRigidBodies } from "@react-three/rapier";

const COUNT = 1000;

const Scene = () => {
  const instancedApi = useRef<InstancedRigidBodyApi>(null);

  useEffect(() => {
    if (!instancedApi.current) {
      return
    }

    // You can access individual instanced by their index
    instancedApi.current.at(40).applyImpulse({ x: 0, y: 10, z: 0 });

    // Or update all instances as if they were in an array
    instancedApi.current.forEach((api) => {
      api.applyImpulse({ x: 0, y: 10, z: 0 });
    });
  }, []);

  // We can set the initial positions, and rotations, and scales, of
  // the instances by providing an array equal to the instance count
  const positions = Array.from({ length: COUNT }, (_, index) => [index, 0, 0]);

  const rotations = Array.from({ length: COUNT }, (_, index) => [
    Math.random(),
    Math.random(),
    Math.random()
  ]);

  const scales = Array.from({ length: COUNT }, (_, index) => [
    Math.random(),
    Math.random(),
    Math.random()
  ]);

  return (
    <InstancedRigidBodies
      ref={instancedApi}
      positions={positions}
      rotations={rotations}
      scales={scales}
      colliders="ball"
    >
      <instancedMesh args={[undefined, undefined, COUNT]}>
        <sphereGeometry args={[0.2]} />
        <meshPhysicalGeometry color="blue" />

        <CuboidCollider args={[0.1, 0.2, 0.1]} />
      </instancedMesh>
    </InstancedRigidBodies>
  );
};
Debug
Use the Debug component to see live representations of all colliders in a scene, using the live debug buffer from the physics engine.
import { Box, Sphere } from "@react-three/drei";
import { RigidBody, Debug } from "@react-three/rapier";

const Scene = () => {
  return (
    <Physics>
      <Debug />

      <RigidBody>
        <Box />
      </RigidBody>
      <RigidBody>
        <Sphere />
      </RigidBody>
    </Physics>
  );
};
Collision Events
You can subscribe to collision and state events on a RigidBody:
🧩 See onCollisionEnter / onCollisionExit docs for more information.
const RigidBottle = () => {
  const [isAsleep, setIsAsleep] = useState(false);

  return (
    <RigidBody
      colliders="hull"
      onSleep={() => setIsAsleep(true)}
      onWake={() => setIsAsleep(false)}
      name="Bally McBallFace"
      onCollisionEnter={({ manifold, target, other }) => {
        console.log(
          "Collision at world position ",
          manifold.solverContactPoint(0)
        );

        if (other.rigidBodyObject) {
          console.log(
            // this rigid body's Object3D
            target.rigidBodyObject.name,
            " collided with ",
            // the other rigid body's Object3D
            other.rigidBodyObject.name
          );
        }
      }}
    >
      <Sphere>
        <meshPhysicalMaterial color={isAsleep ? "white" : "blue"} />
      </Sphere>
    </RigidBody>
  );
};
You may also subscribe to collision events on individual Colliders:
<CuboidCollider
  onCollisionEnter={(payload) => {
    /* ... */
  }}
  onCollisionExit={(payload) => {
    /* ... */
  }}
/>
The payload object for all collision callbacks contains the following properties:
targetCollisionTargetof the object firing the event.otherCollisionTargetof the other object involved in the event.manifold(onCollisionEnter only)
The contact manifold generated by the collision event.flipped(onCollisionEnter only)trueif the data in themanifoldis flipped.
A CollisionTarget is an object containing references to objects involved in a collision event. It has the following properties:
rigidBody(if exists):Rapier.RigidBodyrigidBodyObject(if exists):Three.Object3Dcollider:Rapier.CollidercolliderObject:Three.Object3D
Configuring collision and solver groups
Both <RigidBody> as well as all collider components allow you to configure collisionsGroups and solverGroups properties that configures which groups the colliders are in, and what other groups they should interact with in potential collision and solving events (you will find more details on this in the Rapier documentation.)
Since these are set as bitmasks and bitmasks can get a bit unwieldy to generate, this library provides a helper called interactionGroups that can be used to generate bitmasks from numbers and arrays of groups, where groups are identified using numbers from 0 to 15.
The first argument is the group, or an array of groups, that the collider is a member of; the second argument is the group, or an array of groups, that the collider should interact with.
Here the collider is in group 0, and interacts with colliders from groups 0, 1 and 2:
<CapsuleCollider collisionGroups={interactionGroups(0, [0, 1, 2])} />This collider is in multiple groups, but only interacts with colliders from a single group:
<CapsuleCollider collisionGroups={interactionGroups([0, 5], 7)} />When the second argument is omitted, the collider will interact with all groups:
<CapsuleCollider collisionGroups={interactionGroups(12)} />Note Please remember that in Rapier, for a collision (or solving) event to occur, both colliders involved in the event must match the related interaction groups -- a one-way match will be ignored.
Note By default, colliders are members of all groups, and will interact with all other groups.
Contact force events
Contact force events are triggered on <RigidBody> and any collider components when two objects collider.
<RigidBody
  colliders="ball"
  onContactForce={(payload) => {
    console.log(`The total force generated was: ${payload.totalForce}`);
  }}>
  <Sphere>
    <meshPhysicalMaterial color={'grey'} />
  </Sphere>
</RigidBody>
The payload for the contact force event contains the following properties:
targetCollisionTargetof the object firing the eventotherCollisionTargetof the other object involved in the eventtotalForce
The sum of all the forces between the two colliderstotalForceMagnitude
The sum of the magnitudes of each force between the two collidersmaxForceDirection
The magnitude of the largest force at a contact point of this contact pairmaxForceMagnitude
The world-space (unit) direction of the force with strongest magnitude
More information about each property can be found in the rapier TempContactForceEvent API documentation.
You can also add the onContactForce event to any collider.
<CapsuleCollider
onContactForce={(payload) => {
/* ... */
}}
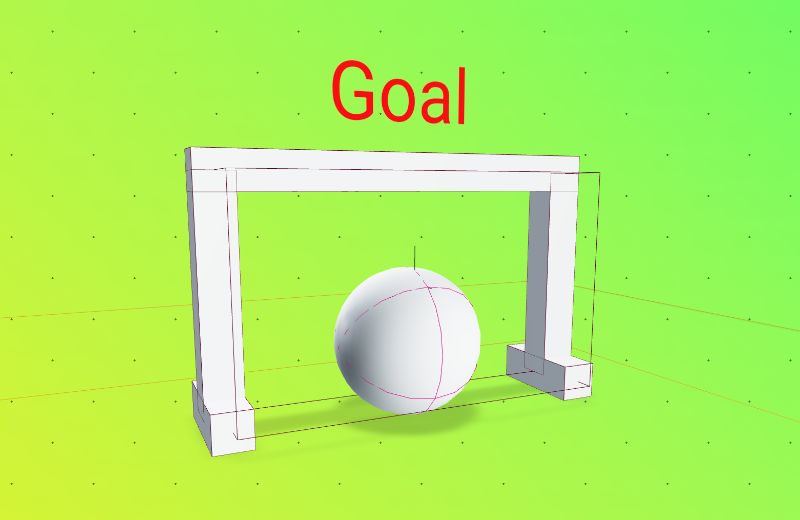
/>Sensors
A Collider can be set to be a sensor, which means that it will not generate any contact points, and will not be affected by forces. This is useful for detecting when a collider enters or leaves another collider, without affecting the other collider.
To detect when a collider enters or leaves another collider, you can use the onIntersectionEnter and onIntersectionExit events on the collider.
🧩 See onIntersectionEnter / onIntersectionExit docs for more information.
```tsx
<RigidBody>
  <GoalPosts />

  <CuboidCollider
    args={[5, 5, 1]}
    sensor
    onIntersectionEnter={() => console.log("Goal!")}
  />
</RigidBody>
🖼 Sensors Example
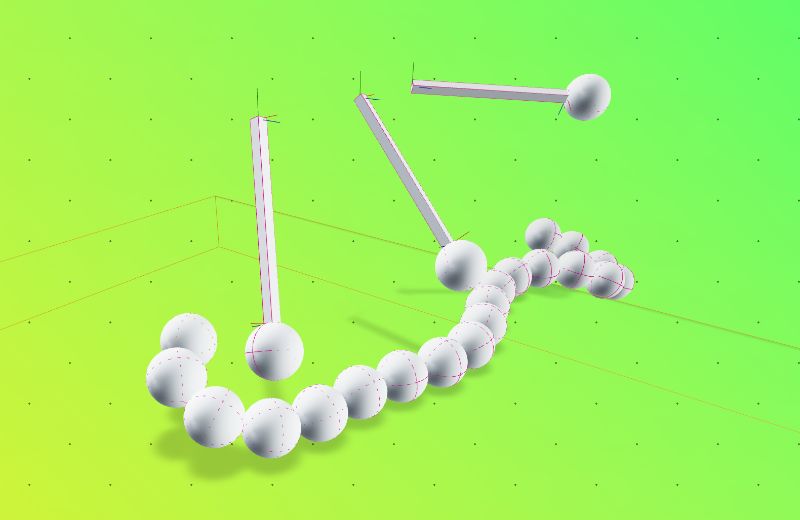
Attractors
An attractor simulates a source of gravity. Any RigidBody within range will be pulled (attracted) toward the attractor.
Setting the strength to a negative value will cause the RigidBody to be pushed (repelled) away from the attractor.
The force applied to rigid-bodies within range is calculated differently depending on the type.
🧩 See Attractor docs for all available props.
// Standard attractor
<Attractor range={10} strength={5} type="linear" position={[5, -5, 0]} />

// An attractor with negative strength, repels RigidBodies
<Attractor range={10} strength={-5} position={[5, -5, 0]} />

// You can also assign InteractionGroups.
// An attractor belonging to group 0 only affecting bodies in group 2, and 3
<Attractor range={10} strength={10} position={[5, -5, 0]} collisionGroups={interactionGroups(0, [2,3])} />
Gravity types:
"static" (Default)
Static gravity means that the same force (strength) is applied on all rigid-bodies within range, regardless of distance."linear"
Linear gravity means that force is calculated asstrength * distance / range. That means the force applied decreases the farther a rigid-body is from the attractor position."newtonian"
Newtonian gravity uses the traditional method of calculating gravitational force (F = GMm/r^2) and as such force is calculated asgravitationalConstant * mass1 * mass2 / Math.pow(distance, 2).gravitationalConstantdefaults to 6.673e-11 but you can provide your ownmass1here is the "mass" of the Attractor, which is just thestrengthpropertymass2is the mass of the rigid-body at the time of calculation. Note that rigid-bodies with colliders will use the mass provided to the collider. This is not a value you can control from the attractor, only from wherever you're creating rigid-body components in the scene.distanceis the distance between the attractor and rigid-body at the time of calculation
🖼 Attractors Example

Configuring Time Step Size
By default, <Physics> will simulate the physics world at a fixed rate of 60 frames per second. This can be changed by setting the timeStep prop on <Physics>:
<Physics timeStep={1 / 30}>{/* ... */}</Physics>The timeStep prop may also be set to "vary", which will cause the simulation's time step to adjust to every frame's frame delta:
<Physics timeStep="vary">{/* ... */}</Physics>Note This is useful for games that run at variable frame rates, but may cause instability in the simulation. It also prevents the physics simulation from being fully deterministic. Please use with care!
Joints
Joints can be made between two RigidBodies to provide a way to restrict a motion of a body in relation to another.
Read more about joints in Rapier: https://rapier.rs/docs/user_guides/javascript/joints
Joints are available in r3/rapier as hooks.
There are 4 different joint types available:
- Fixed (two bodies are fixed together)
- Spherical (two bodies are connected by a ball and socket, for things like arms or chains)
- Revolute (two bodies are connected by a hinge, for things like doors or wheels)
- Prismatic (two bodies are connected by a sliding joint, for things like pistons or sliders)
Fixed Joint
A fixed joint ensures that two rigid-bodies don't move relative to each other. Fixed joints are characterized by one local frame (represented by an isometry) on each rigid-body. The fixed-joint makes these frames coincide in world-space.
🧩 See FixedJoint docs for available options.
const JointedThing = () => {
  const joint = useFixedJoint(
    bodyA,
    bodyB,
    [
      [0, 0, 0], // Position of the joint in bodyA's local space
      [0, 0, 0, 1], // Orientation of the joint in bodyA's local space
      [0, 0, 0], // Position of the joint in bodyB's local space
      [0, 0, 0, 1], // Orientation of the joint in bodyB's local space
    ]);

  return (
    <group>
      <RigidBody ref={bodyA}>
        <mesh />
      </RigidBody>
      <RigidBody ref={bodyB}>
        <mesh />
      </RigidBody>
    </group>
  );
}
Spherical Joint
The spherical joint ensures that two points on the local-spaces of two rigid-bodies always coincide (it prevents any relative translational motion at this points).
🧩 See SphericalJoint docs for available options.
```tsx
const JointedThing = () => {
  const joint = useSphericalJoint(
    bodyA,
    bodyB,
    [
      [0, 0, 0], // Position of the joint in bodyA's local space
      [0, 0, 0], // Position of the joint in bodyB's local space
    ]);

  return (
    <group>
      <RigidBody ref={bodyA}>
        <mesh />
      </RigidBody>
      <RigidBody ref={bodyB}>
        <mesh />
      </RigidBody>
    </group>
  );
}
Revolute Joint
The revolute joint prevents any relative movement between two rigid-bodies, except for relative rotations along one axis. This is typically used to simulate wheels, fans, etc.
🧩 See RevoluteJoint docs for available options.
const JointedThing = () => {
  const joint = useRevoluteJoint(
    bodyA,
    bodyB,
    [
      [0, 0, 0], // Position of the joint in bodyA's local space
      [0, 0, 0], // Position of the joint in bodyB's local space
      [0, 0, 0], // Axis of the joint, expressed in the local-space of the rigid-bodies it is attached to.
    ]);

  return (
    <group>
      <RigidBody ref={bodyA}>
        <mesh />
      </RigidBody>
      <RigidBody ref={bodyB}>
        <mesh />
      </RigidBody>
    </group>
  );
}
Prismatic Joint
The prismatic joint prevents any relative movement between two rigid-bodies, except for relative translations along one axis.
🧩 See PrismaticJoint docs for available options.
```tsx
const JointedThing = () => {
  const joint = usePrismaticJoint(
    bodyA,
    bodyB,
    [
      [0, 0, 0], // Position of the joint in bodyA's local space
      [0, 0, 0], // Position of the joint in bodyB's local space
      [0, 0, 0], // Axis of the joint, expressed in the local-space of the rigid-bodies it is attached to.
    ]);

  return (
    <group>
      <RigidBody ref={bodyA}>
        <mesh />
      </RigidBody>
      <RigidBody ref={bodyB}>
        <mesh />
      </RigidBody>
    </group>
  );
}
Joint APIs
Joints can be controlled imperatively similarily to how RigidBody components can be controlled.
🧩 See Joint API docs for more information.
const JointedThing = () => {
  const joint = useSphericalJoint(...)

  useEffect(() => {
    joint.configureMotorVelocity(1, 0)

    // Disable contacts between the two joint bodies
    joint.raw().setContactsEnabled(false)
  }, [])

  return ...
}
🖼 Joints Example
Advanced hooks usage
Advanced users might need granular access to the physics loop and direct access to the world instance. This can be done by using the following hooks:
useRapier
Gives you access to theworld, direct access torapier, and more.
🧩 See useRapier docs for more information.useBeforePhysicsStep
Allows you to run code before the physics simulation is stepped.
🧩 See useBeforePhysicsStep docs for more information.useAfterPhysicsStepAllows you to run code after the physics simulation is stepped.
🧩 See useAfterPhysicsStep docs for more information.
Manual stepping
You can manually step the physics simulation by calling the step method from the useRapier hook.
const { step } = useRapier();

step(1 / 60);