
Package Exports
- vps-deployer
- vps-deployer/dist/index.js
This package does not declare an exports field, so the exports above have been automatically detected and optimized by JSPM instead. If any package subpath is missing, it is recommended to post an issue to the original package (vps-deployer) to support the "exports" field. If that is not possible, create a JSPM override to customize the exports field for this package.
Readme

VPS Deployer
Deployment made easy.
A lightweight, self-hosted continuous deployment (CD) system with a built-in web UI — manages projects on your VPS, accepts GitHub webhooks for automatic deployments, and sends real-time email notifications on deployment events.


![]()
Features
| 🖥️ Web UI Dashboard | Monitor projects, deployments, and logs from your browser |
| 🔄 GitHub Webhooks | Push to a branch and let VPS Deployer handle the rest |
| 📧 Email Notifications | Get notified on deployment success or failure via SMTP |
| ⚙️ Custom Build Commands | Define per-project command sequences (build, migrate, restart) |
| 🔐 Per-Project Env Vars | Manage .env files through the UI |
| 🪶 Lightweight | Single SQLite database, no external services required |
| 🚀 CLI-Driven | Start with a single command, manage everything from the web |
Prerequisites
- Linux (requires
root/sudofor systemd service creation) - Node.js >= 18
- npm or pnpm
Quick Start
1. Install
npm install -g vps-deployer2. Generate Configs
sudo vps-deployer -w /opt/vps-deployer -p 3000 -s your-super-secret-session-keyThis creates the systemd service file, database, and reference configs, then exits.
| Flag | Description |
|---|---|
-w, --working-dir |
Directory where projects and data will be stored |
-p, --port |
Port for the web UI and API (1024–50000) |
-s, --session-key |
Secret key for session encryption (min 6 characters) |
--dev |
Run in development mode (foreground, no systemd) |
3. Start the Service
sudo vps-deployer startThis enables and starts the systemd service. The terminal is freed immediately.
Dev mode: To run in the foreground without systemd, use
sudo vps-deployer -w /opt/vps-deployer -p 3000 -s key --dev
4. Open the Web UI
Navigate to http://<your-server-ip>:3000 and register your account.
5. Create a Project
- Go to Projects → Create
- Enter your GitHub repo URL and branch name
- Add build/deploy commands (e.g.,
npm install,npm run build,pm2 restart app) - Save — your unique webhook URL and secret will be displayed
6. Configure the Webhook
Copy the webhook URL and secret from the project details page, then add them to your GitHub repo:
Settings → Webhooks → Add webhook → Paste URL → Set Content type to application/json → Paste Secret
7. Deploy
Push to your configured branch. VPS Deployer will receive the webhook, run your commands, and notify you via email.
Important: VPS Deployer does not automatically pull your repository on webhook receipt. You must explicitly add a
git pull(orgit clone) command as the first step in your project's command list. For example:1. git pull origin main 2. npm install 3. npm run build
Screenshots
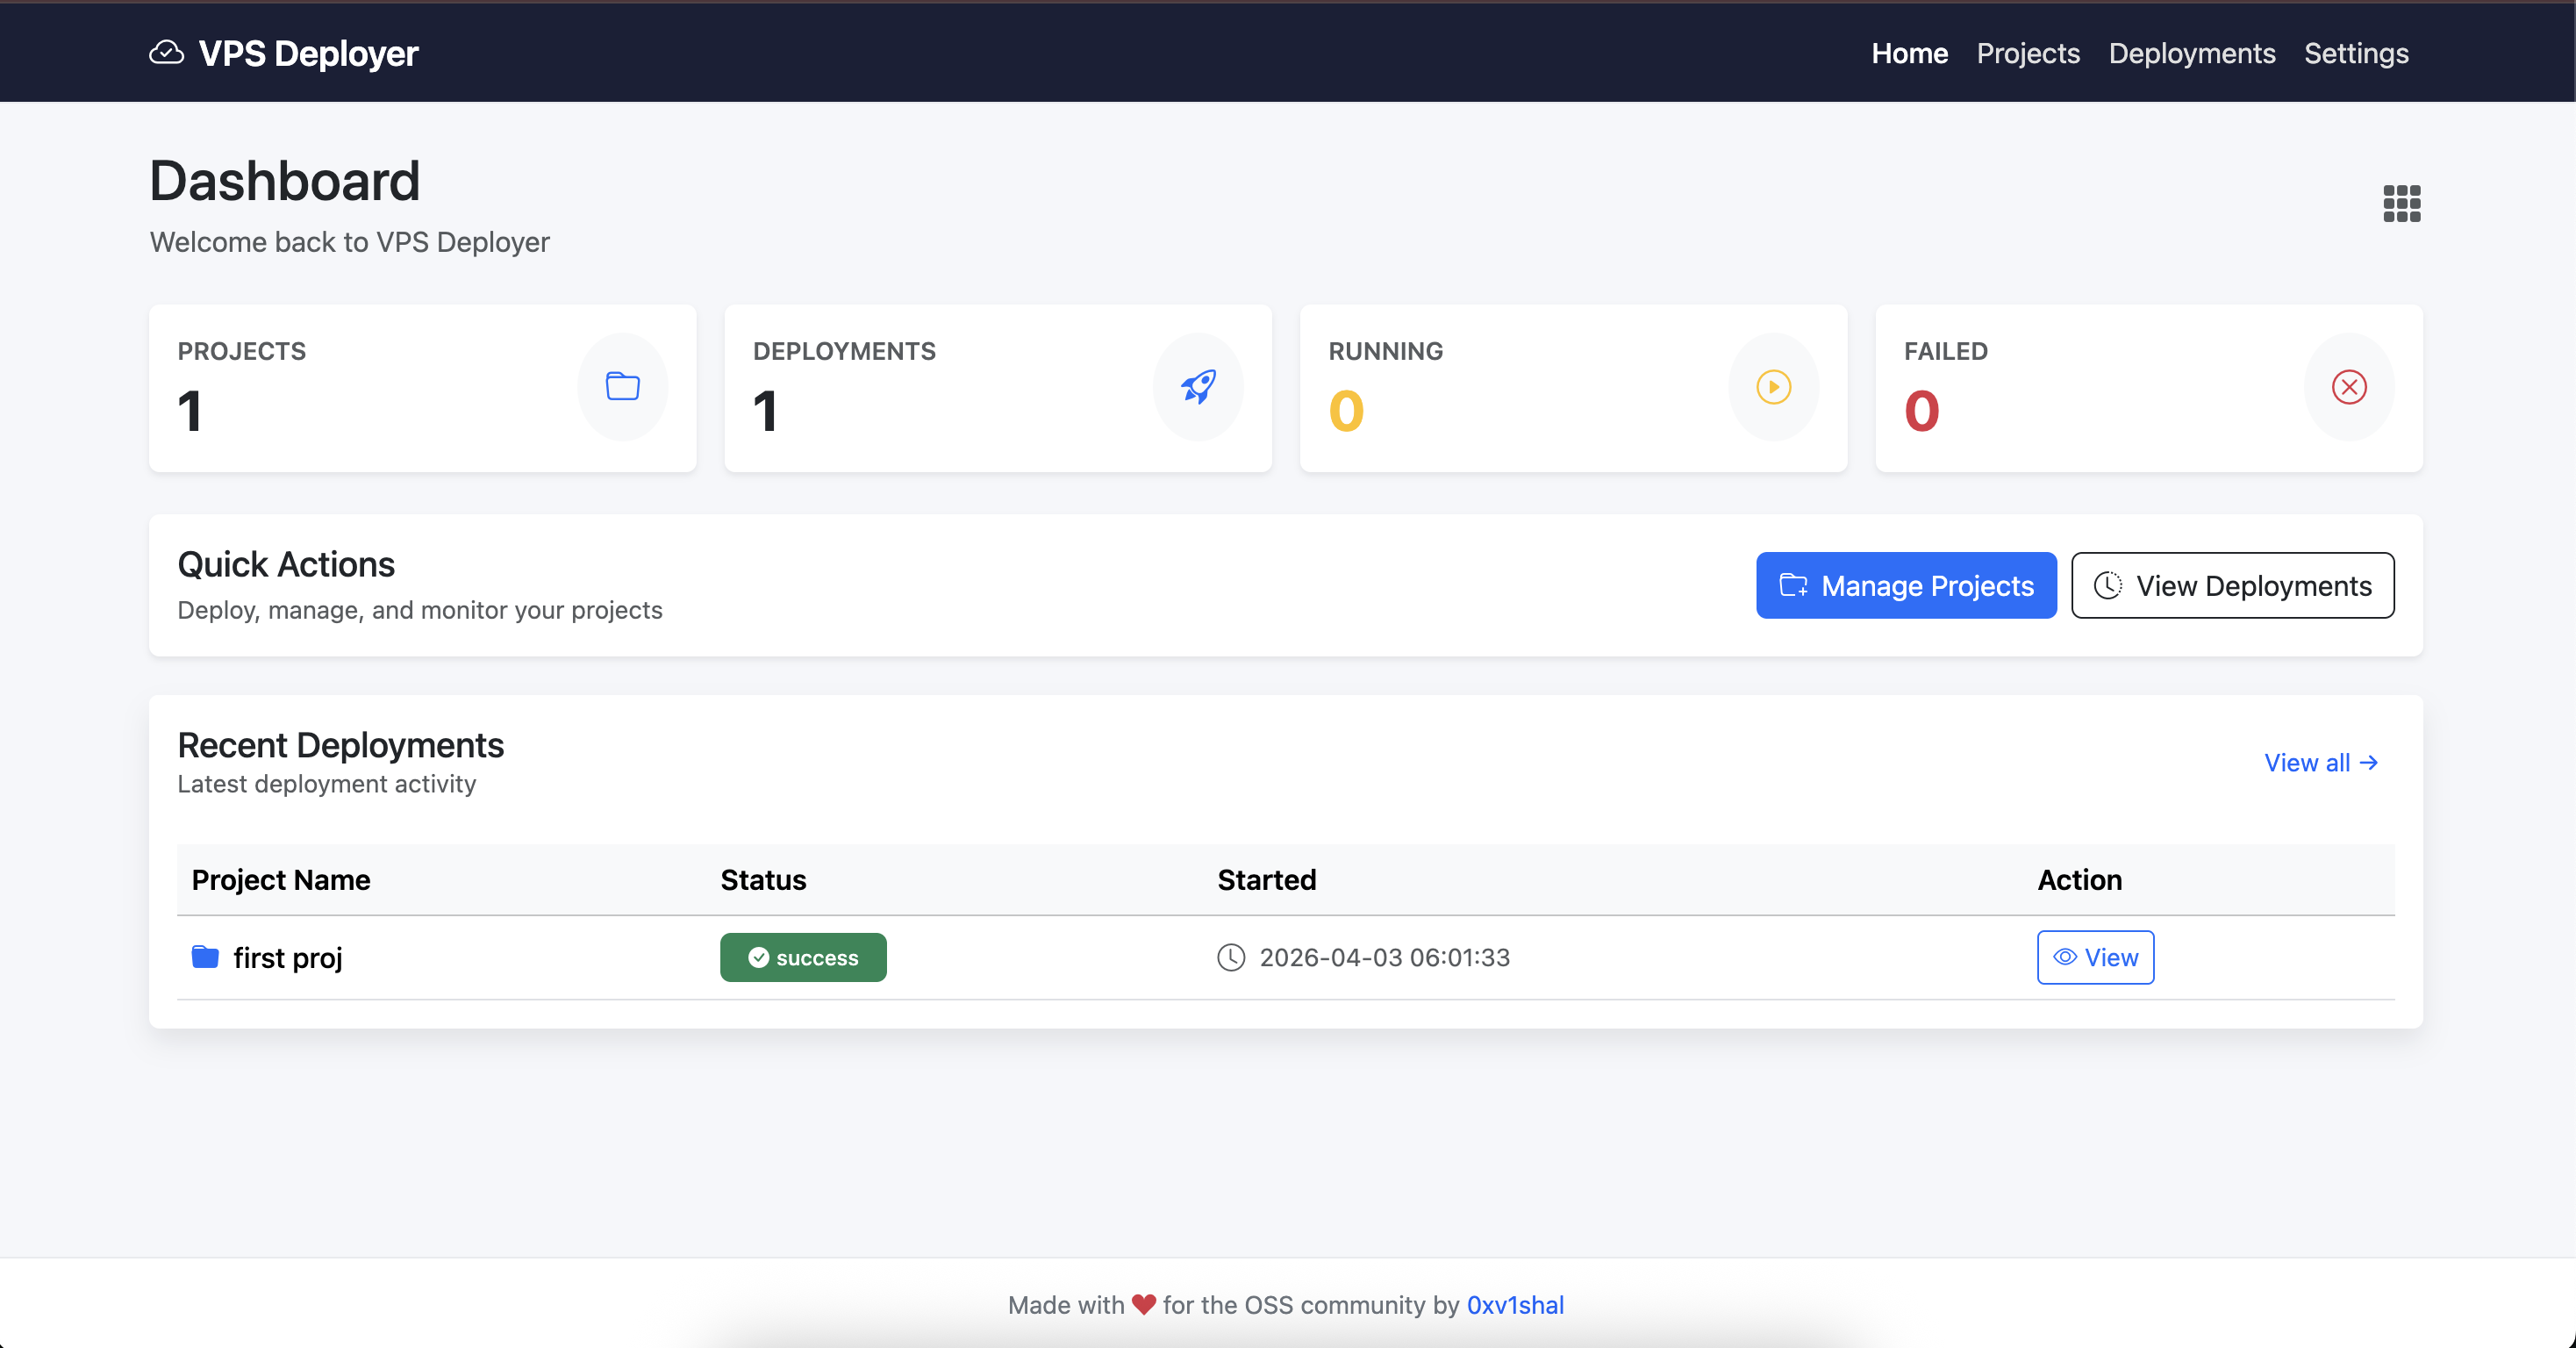
Dashboard with project stats and recent deployments
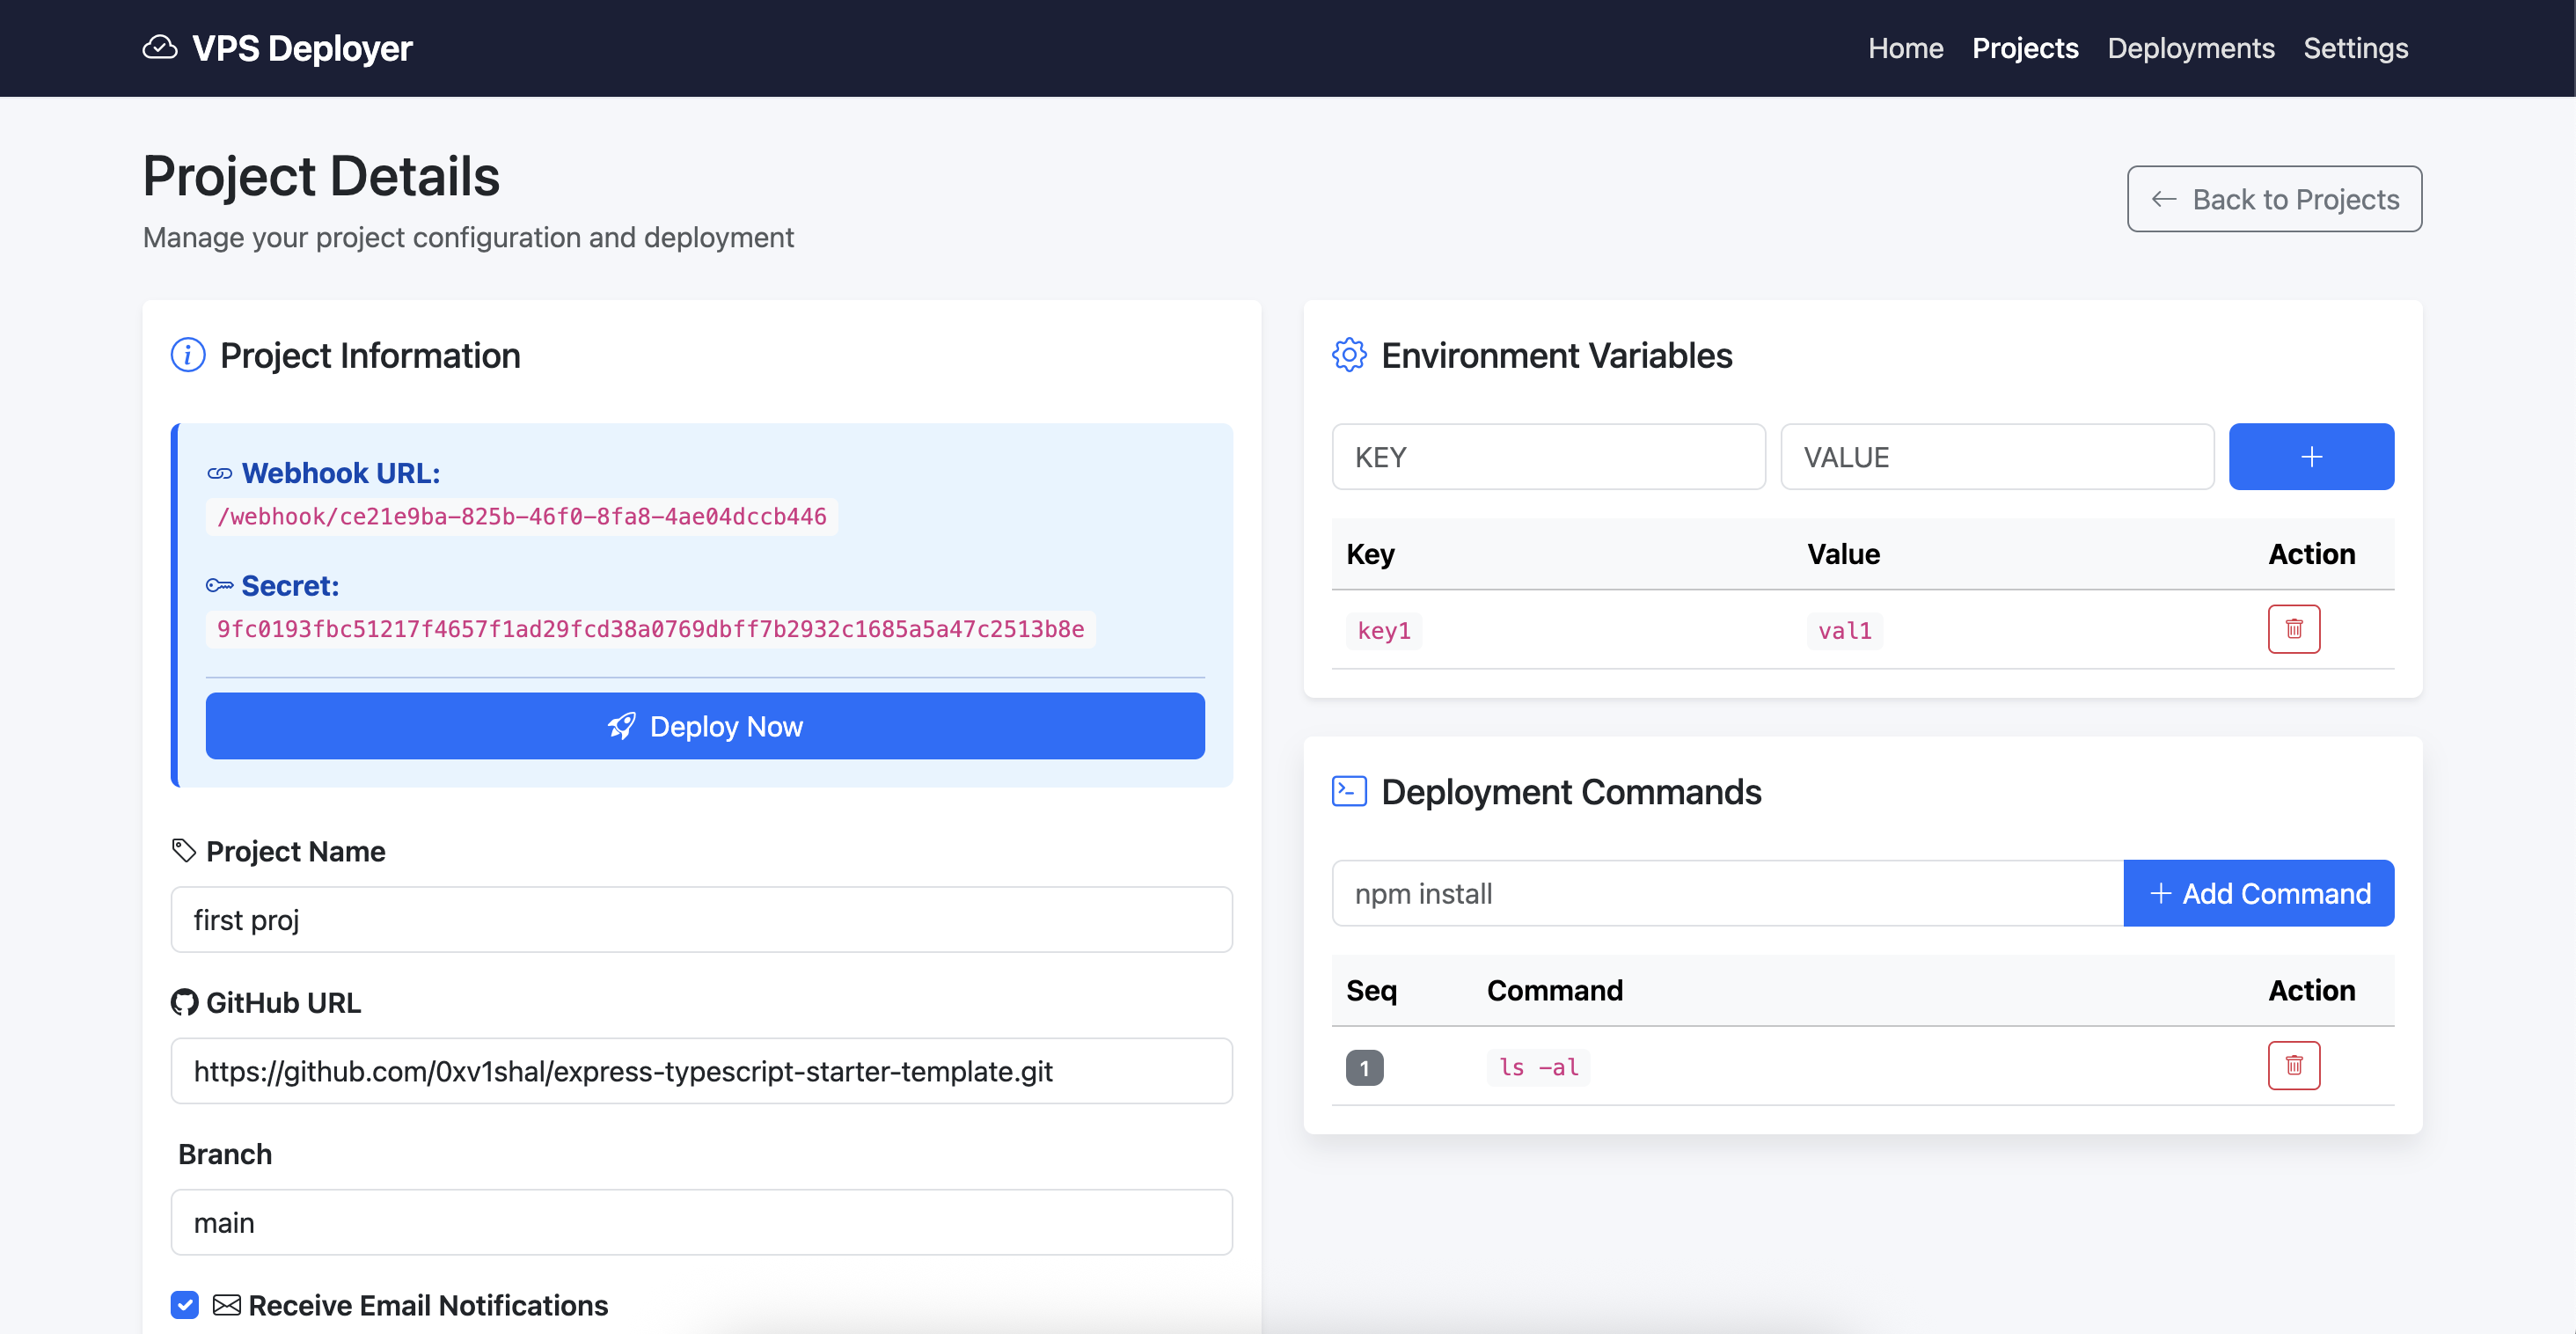
Project configuration with commands and environment variables
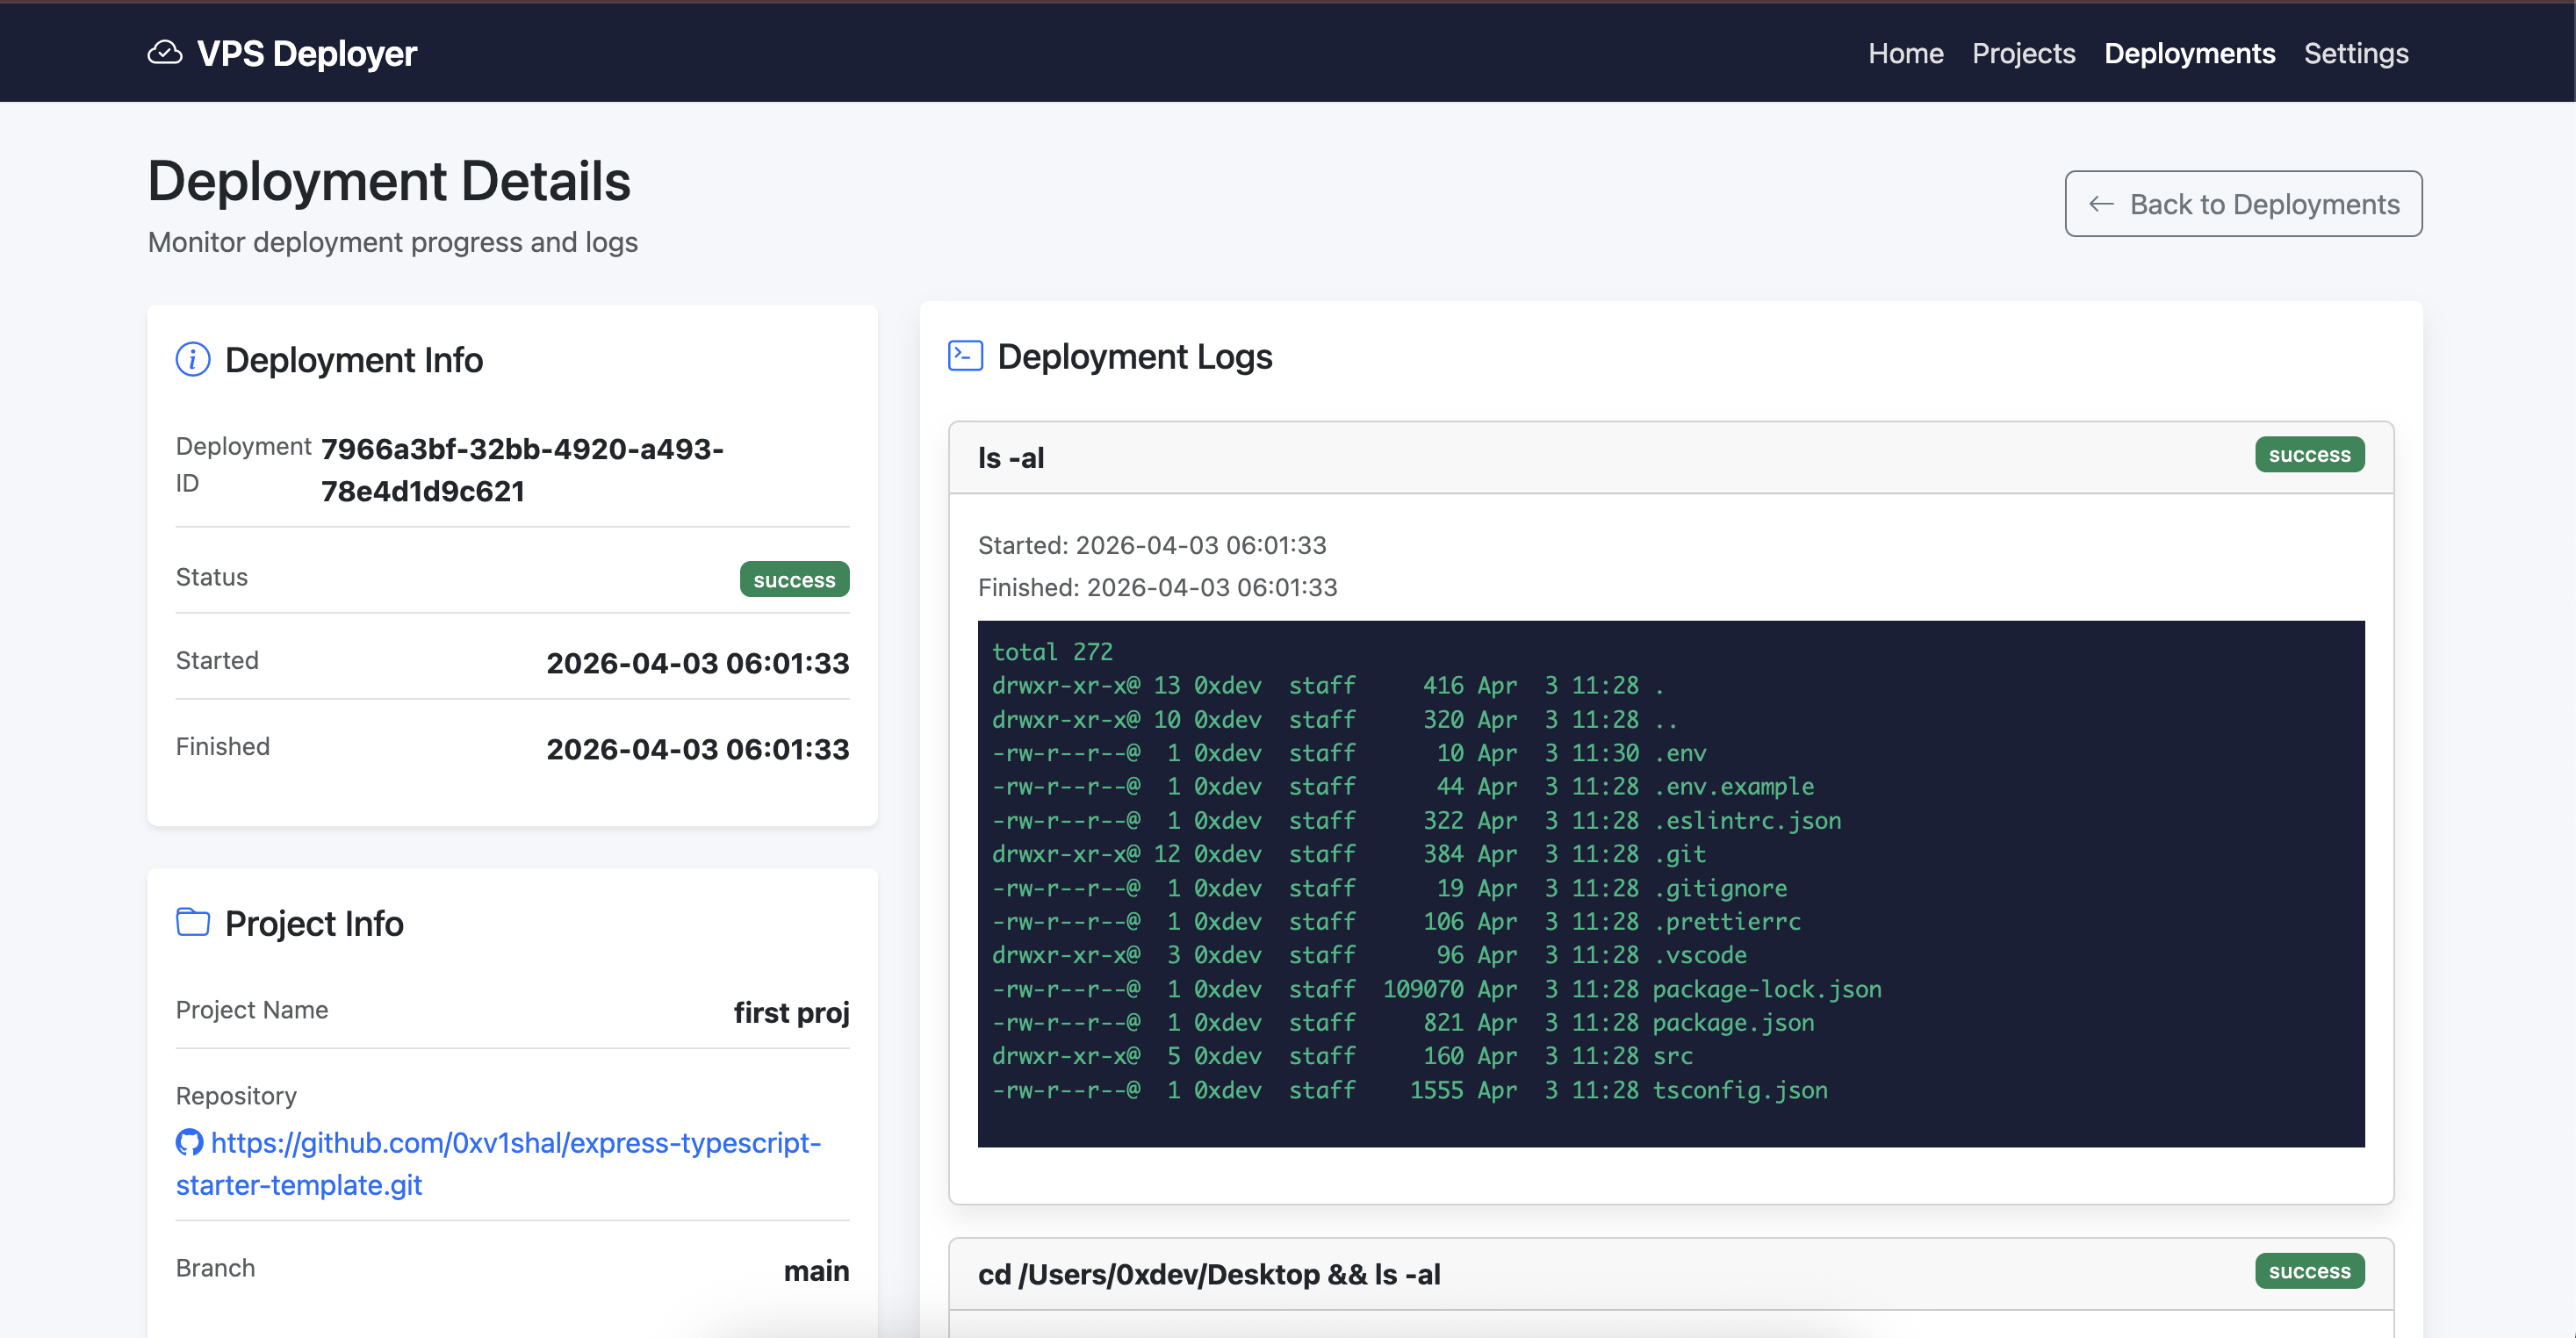
Real-time deployment log output
Project Structure
When you run VPS Deployer, it creates the following structure in your working directory:
/opt/vps-deployer/
├── data.db                    # SQLite database
├── caddy.config               # Generated reverse proxy config
├── nginx.config               # Generated reverse proxy config
├── systemd.file.copy.txt      # Systemd unit file reference
└── <project-id>/              # Per-project workspace
    ├── .env                   # Environment variables
    └── ...                    # Cloned repository files
Documentation
| Document | Description |
|---|---|
| Quick Start | Step-by-step walkthrough from install to first deployment |
| CLI Reference | All flags, validation rules, and examples |
| Webhook Setup | Configure GitHub webhooks for auto-deployment |
| Email Setup | Configure SMTP for deployment notifications |
| Architecture | System design, database schema, and deployment flow |
| Database Schema | Full table definitions |
Security
- This tool must be run as root to create systemd services and execute deployment commands
- The web UI is protected by session-based authentication (login/register)
- Rate limiting is applied on auth endpoints (40 req/min per IP)
- Every webhook is verified using HMAC-SHA256 with a per-project secret
- Use a strong, unique session key (
-sflag) - Keep the working directory restricted to the tool only
License
MIT — see LICENSE for details.