
Package Exports
- code-inspector-core
Readme


📖 Introduction
Click the element on the page, it can automatically open the code editor and position the cursor to the source code of the element.

💻 Try it out online
- vue online demo
- react online demo
- preact online demo
- solid online demo
- qwik online demo
- svelte online demo
- astro online demo
🎨 Support
The following are which compilers, web frameworks and editors we supported now:
- The following bundlers are currently supported:
✅ webpack
✅ vite
✅ rspack / rsbuild
✅ nextjs / nuxt / umijs eg. - The following Web frameworks are currently supported:
✅ vue2
✅ vue3
✅ react
✅ preact
✅ solid
✅ qwik
✅ svelte
✅ astro - The following code editors are currently supported:
VSCode | Visual Studio Code - Insiders | WebStorm | Atom | HBuilderX | PhpStorm | PyCharm | IntelliJ IDEA
🚀 Install
npm i code-inspector-plugin -D
# or
yarn add code-inspector-plugin -D
# or
pnpm add code-inspector-plugin -D
🌈 Usage
Please check here for more usage information: code-inspector-plugin configuration
1.Configuring Build Tools
Click to expand configuration about: webpack
// webpack.config.js
const { codeInspectorPlugin } = require('code-inspector-plugin');

module.exports = () => ({
  plugins: [
    codeInspectorPlugin({
      bundler: 'webpack',
    }),
  ],
});
Click to expand configuration about: vite
// vite.config.js
import { defineConfig } from 'vite';
import { codeInspectorPlugin } from 'code-inspector-plugin';

export default defineConfig({
  plugins: [
    codeInspectorPlugin({
      bundler: 'vite',
    }),
  ],
});
Click to expand configuration about: rspack
// rspack.config.js
const { codeInspectorPlugin } = require('code-inspector-plugin');

module.exports = {
  // other config...
  plugins: [
    codeInspectorPlugin({
      bundler: 'rspack',
    }),
    // other plugins...
  ],
};
Click to expand configuration about: rsbuild
// rsbuild.config.js
const { codeInspectorPlugin } = require('code-inspector-plugin');

module.exports = {
  // other config...
  tools: {
    rspack: {
      plugins: [
        codeInspectorPlugin({
          bundler: 'rspack',
        }),
      ],
    },
  },
};
Click to expand configuration about: vue-cli
// vue.config.js
const { codeInspectorPlugin } = require('code-inspector-plugin');

module.exports = {
  // ...other code
  chainWebpack: (config) => {
    config.plugin('code-inspector-plugin').use(
      codeInspectorPlugin({
        bundler: 'webpack',
      })
    );
  },
};
Click to expand configuration about: nuxt
For nuxt3.x :
// nuxt.config.js
import { codeInspectorPlugin } from 'code-inspector-plugin';

// https://nuxt.com/docs/api/configuration/nuxt-config
export default defineNuxtConfig({
  vite: {
    plugins: [codeInspectorPlugin({ bundler: 'vite' })],
  },
});
For nuxt2.x :
// nuxt.config.js
import { codeInspectorPlugin } from 'code-inspector-plugin';

export default {
  build: {
    extend(config) {
      config.plugins.push(codeInspectorPlugin({ bundler: 'webpack' }));
      return config;
    },
  },
};
Click to expand configuration about: next.js
// next.config.js
const { codeInspectorPlugin } = require('code-inspector-plugin');

const nextConfig = {
  webpack: (config, { dev, isServer }) => {
    config.plugins.push(codeInspectorPlugin({ bundler: 'webpack' }));
    return config;
  },
};

module.exports = nextConfig;
Click to expand configuration about: umi.js
// umi.config.js or umirc.js
import { defineConfig } from '@umijs/max';
import { codeInspectorPlugin } from 'code-inspector-plugin';

export default defineConfig({
  chainWebpack(memo) {
    memo.plugin('code-inspector-plugin').use(
      codeInspectorPlugin({
        bundler: 'webpack',
      })
    );
  },
  // other config
});
Click to expand configuration about: astro
// astro.config.mjs
import { defineConfig } from 'astro/config';
import { codeInspectorPlugin } from 'code-inspector-plugin';

export default defineConfig({
  vite: {
    plugins: [codeInspectorPlugin({ bundler: 'vite' })],
  },
});
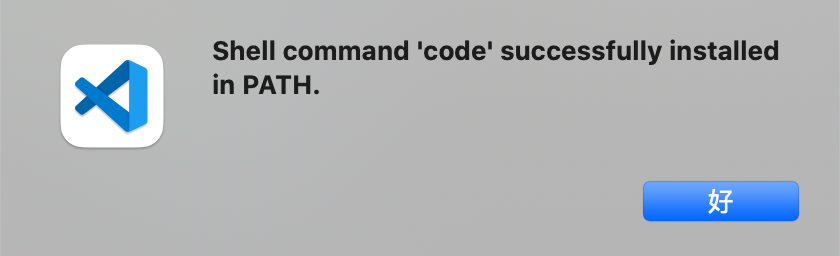
2.Configuring VSCode Command Line Tool
Tip: Skip for Windows or other IDEs
This step is only required for Mac with vscode as IDE. Skip this step if your computer is Windows or if you use another IDE.In VSCode, press
command + shift + p, search for and clickShell Command: Install 'code' command in PATH:
If you see the dialog box below, the configuration was successful:
3.Enjoy using it
When pressing the combination keys on the page, moving the mouse over the page will display a mask layer on the DOM with relevant information. Clicking will automatically open the IDE and position the cursor to the corresponding code location. (The default combination keys for Mac are
Option + Shift; for Windows, it'sAlt + Shift, and the browser console will output related combination key prompts)
👨💻 Contributors
Special thanks to the contributors of this project:
📧 Communication and Feedback
For any usage issues, please leave a message below my Twitter post or submit an issue on Github.
For Chinese users, you can you can join the QQ group 769748484 add the author's WeiXin account zhoulx1688888 for consultation and feedback:


💖 Sponsor
Sponsoring this project can help the author create better. If you are willing, thanks for sponsoring me through here.