
Package Exports
- uploader
- uploader/dist/main.js
This package does not declare an exports field, so the exports above have been automatically detected and optimized by JSPM instead. If any package subpath is missing, it is recommended to post an issue to the original package (uploader) to support the "exports" field. If that is not possible, create a JSPM override to customize the exports field for this package.
Readme
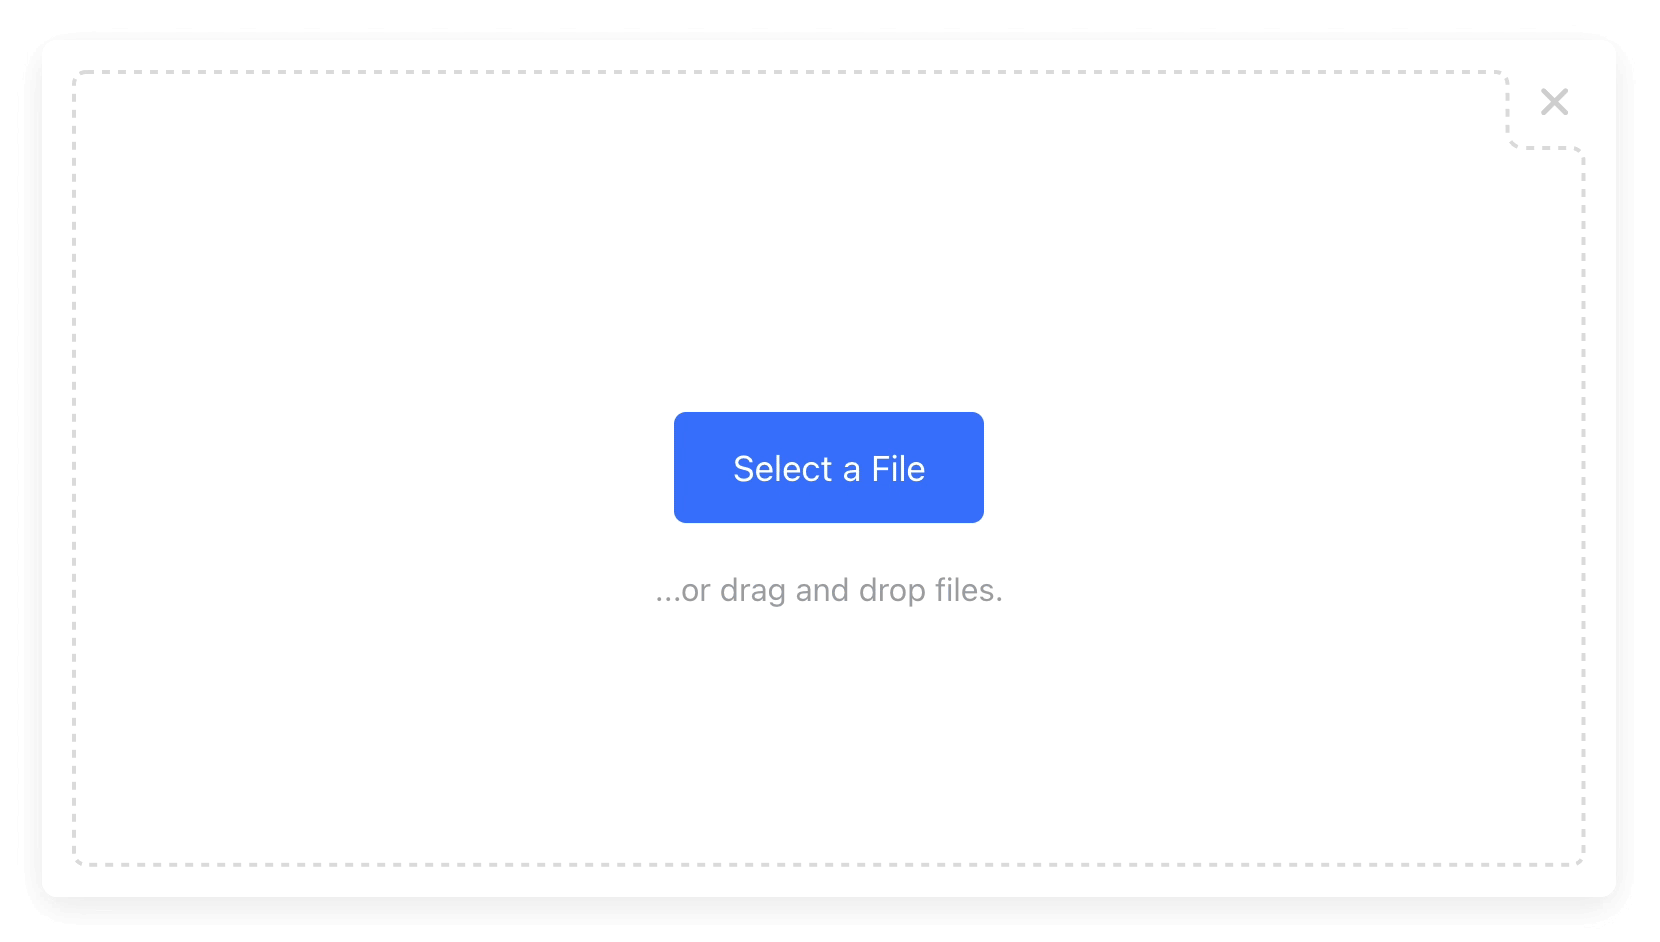
File & Image Upload Widget
(With Integrated Cloud Storage)


Get Started — Try on CodePen
Supported Frameworks:
React • Vue • Angular • jQuery • Plain JS
Supported Features:
Image Cropping • Image Uploads • Multi-file Uploads • Drag-and-Drop • More...
Installation
Install via NPM:
npm install uploaderOr via YARN:
yarn add uploaderOr via a <script> tag:
<script src="https://js.upload.io/uploader/v1"></script>Usage
Initialize
Initialize once at the start of your application:
// Ignore if installed via a script tag.
const { Uploader } = require("uploader");

// Get production API keys from Upload.io
const uploader = new Uploader({
  apiKey: "free"
});
Open the Modal
With JavaScript — Try on CodePen:
uploader.open({ multi: true }).then(files => {
  if (files.length === 0) {
    console.log('No files selected.')
  } else {
    console.log('Files uploaded:');
    console.log(files.map(f => f.fileUrl));
  }
}).catch(err => {
  console.error(err);
});
Or with HTML — Try on CodePen:
<button data-upload-config='{ "multi": true }'
        data-upload-complete='alert(
          `Files uploaded:\n${event.files.map(x => x.fileUrl).join("\n")}`
        )'>
  Upload Files...
</button>
Note: you still need to initialize the Uploader when using data-* attributes.
Get the Result
With JavaScript:
.open() returns Promise<Array<UploaderResult>>:
{
  fileUrl: "https://upcdn.io/FW25...",          // The URL to use when serving this file.

  editedFile: undefined,                        // The edited file (if present). Same as below.

  originalFile: {
    accountId: "FW251aX",                       // The Upload.io account that owns the file.
    file: { ... },                              // DOM file object (from the <input> element).
    fileId: "FW251aXa9ku...",                   // The uploaded file ID.
    fileUrl: "https://upcdn.io/FW25...",        // The uploaded file URL.
    fileSize: 12345,                            // File size in bytes.
    mime: "image/jpeg",                         // File MIME type.
    suggestedOptimization: {
      transformationUrl: "https://upcdn.io/..", // The suggested URL for serving this file.
      transformationSlug: "thumbnail"           // Append to 'fileUrl' to produce the above URL.
    },
    tags: [                                     // Tags manually & auto-assigned to this file.
      { name: "tag1", searchable: true },
      { name: "tag2", searchable: true },
      ...
    ]
  }
}
Or with HTML:
<a data-upload-complete="console.log(JSON.stringify(event.files))">
  Upload a file...
</a>- The
data-upload-completeattribute is fired on completion. - The
event.filesarray contains the uploaded files. - The above example opens an Uploader which logs the same output as the JavaScript example.
👀 More Examples
Creating an Image Uploader
Uploader contains a built-in image cropper:

The cropper appears by default, but can be disabled with crop: false (see examples below):
With JavaScript — Try on CodePen:
uploader
  .open({
    multi: false,
    mimeTypes: ["image/jpeg", "image/png", "image/webp"],
    editor: {
      images: {
        crop: true,
        cropShape: "circ", // "rect" also supported.
        cropRatio: 1 / 1   // "1" is enforced for "circ".
      }
    }
  })
  .then(files => alert(JSON.stringify(files)));
Or with HTML — Try on CodePen:
<button data-upload-complete='alert(JSON.stringify(event.files))'
        data-upload-config='{
          "multi": false,
          "mimeTypes": ["image/jpeg", "image/png", "image/webp"],
          "editor": {
            "images": {
              "crop": true,
              "cropShape": "circ",
              "cropRatio": 1
            }
          }
        }'>
  Upload an Image...
</button>
Creating a "Single File" Upload Button
With JavaScript — Try on CodePen:
uploader.open().then(files => alert(JSON.stringify(files)));Or with HTML — Try on CodePen:
<button data-upload-complete='alert(JSON.stringify(event.files))'>
  Upload a Single File...
</button>
Creating a "Multi File" Upload Button
With JavaScript — Try on CodePen:
uploader.open({ multi: true }).then(files => alert(JSON.stringify(files)));Or with HTML — Try on CodePen:
<button data-upload-config='{ "multi": true }'
        data-upload-complete='alert(JSON.stringify(event.files))'>
  Upload Multiple Files...
</button>
Creating a Dropzone
You can use Uploader as a dropzone — rather than a modal — by specifying layout: "inline" and a container:
With JavaScript — Try on CodePen:
uploader.open({
  multi: true,
  layout: "inline",
  container: "#example_div_id",  // Replace with the ID of an existing DOM element.
  onUpdate: (files) => console.log(files)
})
Or with HTML — Try on CodePen:
<div data-upload-config='{ "multi": true }'
     data-upload-complete="console.log(event.files)"
     style="position: relative; width: 450px; height: 300px;">
</div>
Note:
- You must set
position: relative,widthandheighton the containerdiv. - The
Finishbutton is hidden by default in this mode (override with"showFinishButton": true). - When using the HTML approach:
- The
container&layout: "inline"config options are automatically set. - The
data-upload-completecallback is fired every time the list of uploaded files changes. - The
data-upload-finalizedcallback is fired whenFinishis clicked (if visible, see comment above).
- The
⚙️ Configuration
All configuration is optional.
With JavaScript:
uploader
  .open({
    container: "body",           // "body" by default.
    layout: "modal",             // "modal" by default. "inline" also supported.
    locale: myCustomLocale,      // EN_US by default. (See "Localization" section below.)
    maxFileCount: 5,             // Unlimited by default (or 1 if multi: false).
    maxFileSizeBytes: 1024 ** 2, // Unlimited by default.
    mimeTypes: ["image/jpeg"],   // Unrestricted by default.
    multi: false,                // False by default.
    onUpdate: files => {},       // Called each time the list of uploaded files change.
    showFinishButton: true,      // Whether to show the "finish" button in the widget.
    showRemoveButton: true,      // Whether to show the "remove" button next to each file.
    styles: {
      colors: {
        primary: "#377dff",      // Primary color (e.g. buttons).
        active: "#528fff"        // Active/hover color (inferred from primary by default).
      },
      fontSizes: {
        base: 16                 // Base font size (px).
      }
    },
    tags: ["profile_picture"],   // Requires an Upload.io account.
    editor: {
      images: {
        crop: true,              // True by default.
        cropRatio: 4 / 3,        // width / height. undefined enables freeform (default).
        cropShape: "rect"        // "rect" (default) or "circ".
      }
    },
  })
  .then(files => alert(files))
Or with HTML:
<button data-upload-complete='alert(event.files)'
        data-upload-config='{
          "container": "body",
          "layout": "modal",
          "multi": false
        }'>
  Upload a File...
</button>
🏳️ Localization
Default is EN_US:
const myCustomLocale = {
  "error!": "Error!",
  "done": "Done",
  "addAnotherFile": "Add another file...",
  "addAnotherImage": "Add another image...",
  "cancel": "cancel",
  "cancelled!": "cancelled",
  "continue": "Continue",
  "crop": "Crop",
  "finish": "Finished",
  "finishIcon": true,
  "image": "Image",
  "maxFilesReached": "Maximum number of files:",
  "maxImagesReached": "Maximum number of images:",
  "maxSize": "File size limit:",
  "next": "Next",
  "of": "of",
  "orDragDropFile": "...or drag and drop a file.",
  "orDragDropFiles": "...or drag and drop files.",
  "orDragDropImage": "...or drag and drop an image.",
  "orDragDropImages": "...or drag and drop images.",
  "pleaseWait": "Please wait...",
  "removed!": "removed",
  "remove": "remove",
  "skip": "Skip",
  "unsupportedFileType": "File type not supported.",
  "uploadFile": "Upload a File",
  "uploadFiles": "Upload Files",
  "uploadImage": "Upload an Image",
  "uploadImages": "Upload Images"
}
Where are my files stored?
Uploader uses Upload.io as a file storage & file hosting backend.
Upload.io benefits developers with:
- Zero Setup (Start uploading in the next few minutes!)
- Pre-Integrated Storage (All you need is an Upload API key)
- Fast File Hosting (Worldwide CDN, 300 Nodes)
- Powerful Rules Engine (Rate Limiting, Traffic Limiting, IP Blacklisting, Expiring Links, etc)
- File Transformations (Image Resizing, Cropping, Optimization, etc)
🔧 Can I bring my own file storage?
Uploader's USP is to provide the fastest way to integrate end-to-end file uploads into a web app, while remaining customizable. As such, Uploader will always be closely integrated with the Upload.io platform, and there are currently no plans to support custom backends. You may, however, sync files from your Upload.io account to a custom storage target.
🌐 API Support
You can use Upload.io's File Upload API directly to achieve:
- File uploading.
- File listing.
- File deleting.
- And more...
Uploading a "Hello World" text file is as simple as:
curl --data "Hello World" \
     -u apikey:free \
     -X POST "https://api.upload.io/v1/files/basic"
Note: Remember to set -H "Content-Type: mime/type" when uploading other file types!
Read the File Upload API docs »
Building From Source
Please read: BUILD.md
Contribute
If you would like to contribute to Uploader:
- Add a GitHub Star to the project (if you're feeling generous!).
- Determine whether you're raising a bug, feature request or question.
- Raise your issue or PR.
For more examples, see CodePen and CodeSandbox.